How to Fix A Sagging Headliner [5 Quick Methods]
To fix a sagging headliner, you can use adhesive spray, push pins, upholstery twist pins, needle and thread, or a headliner repair kit. The headliner can be repaired using any of these methods.
Sagging headliners are a common problem in older vehicles and can be fixed easily with these quick and effective methods. A sagging headliner can be a frustrating and unsightly problem in your vehicle. It not only affects the overall appearance of your car but can also block your view and pose a safety hazard.
Fortunately, there are several quick and effective methods to fix a sagging headliner. We will explore five different techniques that you can use to repair your sagging headliner.
Whether you choose to use adhesive spray, push pins, upholstery twist pins, needle and thread, or a headliner repair kit, you can easily restore your headliner to its former glory. Keep reading to discover the step-by-step instructions for each method and choose the one that suits you best.
Understanding The Causes Of A Sagging Headliner
A sagging headliner can be a frustrating and unsightly issue for any car owner. Not only does it affect the overall appearance of your vehicle’s interior, but it can also impact your driving experience. Understanding the causes of a sagging headliner is the first step towards finding a solution.
In this section, we will explore what a sagging headliner is, the common causes behind it, and why it is important to address this problem promptly.
What Is A Sagging Headliner?
A sagging headliner refers to the drooping or hanging fabric that lines the roof of your car’s interior. Typically, headliners are made from foam-backed fabric, which is attached to the roof using adhesive. Over time, various factors can cause the headliner to lose its grip, resulting in sagging and detachment from the roof.
Common Causes Of A Sagging Headliner
There are several factors that can contribute to a sagging headliner. By understanding these causes, you can take necessary steps to prevent or rectify the issue. Here are some common reasons behind a sagging headliner:
- Age and wear: As vehicles age, the adhesive that holds the headliner in place can deteriorate, leading to sagging.
- High temperatures: Prolonged exposure to heat can weaken the adhesive and cause the headliner to sag.
- Moisture and humidity: Excessive moisture or high levels of humidity can lead to the degradation of the adhesive, resulting in a sagging headliner.
- Improper installation: If the headliner was not installed correctly during manufacturing or repair, it may start to sag prematurely.
- Sunroof leaks: If your car has a sunroof, leaks can occur, allowing water to seep into the headliner and weaken the adhesive.
The Importance Of Addressing A Sagging Headliner Promptly
While a sagging headliner may seem like a minor inconvenience, it is important to address the issue promptly to avoid further complications. Here’s why:
- Safety: A sagging headliner can obstruct your view while driving, potentially causing accidents or compromising your ability to react quickly to road conditions.
- Resale value: A well-maintained interior can significantly impact the resale value of your vehicle. A sagging headliner can give the impression of poor maintenance and reduce the value of your car.
- Avoid further damage: If left unattended, a sagging headliner can worsen over time. The sagging fabric can catch on objects or become more detached, making it difficult to repair and requiring a complete replacement.
- Aesthetics and comfort: As car owners, we spend a significant amount of time inside our vehicles. A sagging headliner affects the overall aesthetics of the interior and can be an annoyance, negatively impacting your enjoyment and comfort while driving.
In the next section, we will delve into quick and effective methods to fix a sagging headliner, allowing you to restore the beauty and functionality of your car’s interior. Stay tuned!
Remember, understanding the causes of a sagging headliner is crucial for finding the right solution. By addressing this problem promptly, you can ensure a safe and comfortable driving experience while maintaining the value of your vehicle. So let’s jump into the next section and explore some quick and effective methods to fix that sagging headliner!
Method 1: Using Adhesive Spray
Fixing a sagging headliner can be a frustrating task, but with the right methods, it is possible to restore your car’s interior to its former glory. One effective method for fixing a sagging headliner is by using adhesive spray. In this section, we will guide you through the process of using adhesive spray to fix your sagging headliner.
To ensure a successful repair, it is important to follow the necessary preparation and safety measures.
Preparation And Safety Measures
Before you begin the repair process, it is crucial to gather the necessary materials and take proper safety precautions. Here’s what you need to do:
- Gather the materials: Adhesive spray, masking tape, scissors, and a clean cloth.
- Choose a well-ventilated area: Perform the repair in a well-ventilated space to avoid inhaling potentially harmful fumes.
- Protect your hands and eyes: Wear gloves and safety goggles to protect yourself from any potential adhesive spray contact.
Step-By-Step Guide For Using Adhesive Spray
Using adhesive spray to fix a sagging headliner requires careful application to achieve a long-lasting repair. Follow these steps to complete the process:
- Preparation: Begin by removing all loose and hanging parts of the headliner, making sure to clean the surface thoroughly. Remove any old adhesive residue using a clean cloth.
- Protect surrounding areas: Cover the car’s interior and window areas with masking tape or newspaper to prevent any overspray from damaging the surrounding surfaces.
- Apply adhesive spray: Shake the adhesive spray can well and hold it upright. Spray a light, even coat of adhesive on both the headliner surface and the backside of the headliner fabric. Make sure to follow the manufacturer’s instructions for the specific product you are using.
- Attach the headliner fabric: Immediately after applying the adhesive spray, carefully press the headliner fabric onto the headliner surface. Start from one end and work your way across, smoothing out any wrinkles or bubbles as you go.
- Allow time for drying: Leave the headliner undisturbed for the recommended drying time specified by the adhesive spray manufacturer. This allows the adhesive to bond properly and ensures a secure fix.
- Trim any excess fabric: Once the adhesive has dried, carefully trim any excess fabric from the edges of the headliner using scissors. Take your time to achieve clean and precise cuts.
Tips For A Successful Adhesive Spray Repair
To ensure a successful adhesive spray repair for your sagging headliner, keep these tips in mind:
- Read the manufacturer’s instructions: Always follow the specific instructions provided with the adhesive spray product you are using.
- Work in small sections: Apply the adhesive spray and attach the fabric in small sections to prevent the adhesive from drying too quickly.
- Smooth out bubbles and wrinkles: Use a clean cloth or your hands to gently smooth out any bubbles or wrinkles in the headliner fabric while it is still wet with adhesive.
- Avoid excessive use of adhesive spray: Applying too much adhesive spray can lead to a messy and ineffective repair. A light and even coat should be sufficient.
- Be patient with drying time: Give the adhesive ample time to dry fully before touching or manipulating the headliner. Rushing the drying process may result in a poor bond.
Using adhesive spray is an effective method to fix a sagging headliner. By carefully following the step-by-step guide and these helpful tips, you can restore your car’s interior and enjoy a sag-free headliner once again.
Method 2: Using Fabric Glue
Fabric glue can be an effective solution for fixing a sagging headliner in your vehicle. It is a quick and easy method that requires minimal tools and can yield long-lasting results. In this section, we will explore the introduction to fabric glue as a repair option, how to prepare the headliner and apply fabric glue, and the proper techniques for achieving a successful repair.
Introduction To Fabric Glue As A Repair Option
Fabric glue is a versatile adhesive specifically designed for bonding fabric to various surfaces. It is a popular choice for repairing sagging headliners due to its strong bonding capabilities and easy application process. Here are some key points to consider:
- Fabric glue is a cost-effective alternative to expensive professional headliner repairs.
- It is readily available at most craft or automotive stores, making it easily accessible for anyone looking to fix their sagging headliner.
- Unlike traditional adhesives, fabric glue dries clear and remains flexible, ensuring a seamless repair that blends seamlessly with the vehicle’s interior.
Preparing The Headliner And Fabric Glue Application
Before applying fabric glue to the sagging headliner, proper preparation is essential for a successful repair. Follow these steps for optimal results:
- Start by cleaning the headliner surface with a mild detergent to remove any dirt, grease, or residue. This will ensure better adhesion and longevity of the repair.
- Next, use a brush or cloth to gently scrub the headliner, paying close attention to any areas with visible sagging or loose fabric. Smooth out any wrinkles or folds to create a flat surface for the fabric glue.
- Allow the headliner to dry completely before proceeding with the fabric glue application. This step is crucial as moisture can interfere with the bonding process and compromise the repair’s effectiveness.
Proper Techniques For Applying Fabric Glue
To achieve the best results when using fabric glue to fix a sagging headliner, follow these techniques:
- Apply fabric glue evenly on both the headliner surface and the back of the fabric. This will ensure maximum adhesion and prevent any areas from lifting or sagging over time.
- Use a brush or sponge to spread the fabric glue on the headliner and fabric. Ensure that the glue covers the entire surface area, but avoid applying excessive amounts as this can cause the fabric to become stiff or create bumps.
- Press the fabric firmly onto the headliner, starting from the center and working your way outwards. Smooth out any wrinkles or bubbles with your hands, ensuring a tight and secure bond.
- Allow the fabric glue to dry completely as per the manufacturer’s instructions. This may take several hours or overnight, so be patient and avoid touching or disturbing the repair during this time.
- Once the fabric glue has dried, inspect the repaired area for any loose edges or areas that may require additional adhesive. Apply a small amount of fabric glue to these areas, ensuring a seamless and long-lasting repair.
Using fabric glue to fix a sagging headliner is a simple and effective method that anyone can tackle with ease. By following the steps outlined in this section and using the proper techniques, you can restore your headliner’s appearance and functionality in no time.
Method 3: Installing New Headliner Material
Is your car’s headliner sagging and in need of repair? Don’t worry, installing new headliner material is a simple and effective solution to bring back that fresh and clean look to your car’s interior. In this section, we will guide you through the process of installing new headliner material, including when to consider this method, the tools and materials needed, and a step-by-step guide to get the job done.
When To Consider Installing New Headliner Material
Installing new headliner material is a great option when:
- The existing headliner material is severely damaged, torn, or sagging beyond repair.
- You want to upgrade the look of your car’s interior with a different color or material.
- You prefer a diy approach rather than hiring a professional to fix the sagging headliner.
Tools And Materials Needed For The Replacement
Before you start the installation process, make sure you have the following tools and materials ready:
- Screwdriver or trim removal tool
- Adhesive spray or glue
- New headliner fabric (make sure it matches the dimensions of your car’s headliner)
- Scissors or utility knife
- Masking tape or clips
- Cleaning solution and cloth
Step-By-Step Guide To Installing A New Headliner Material
Now let’s walk through the process of installing a new headliner material step by step:
- Remove the existing headliner: Start by removing any accessories attached to the headliner, such as visors and grab handles. Carefully pry off any trim pieces using a screwdriver or trim removal tool. Once the trim is removed, gently pull down the old headliner material, being careful not to damage the underlying structure.
- Clean the headliner board: Use a cleaning solution and cloth to remove any dirt, stains, or adhesive residue from the headliner board. Make sure the board is dry before proceeding to the next step.
- Cut the new headliner fabric: Lay the new headliner fabric on a clean and flat surface. Place the old headliner material on top of it as a template and trace around it. Use scissors or a utility knife to cut the fabric along the traced lines.
- Apply adhesive: Follow the instructions on the adhesive spray or glue and apply it evenly to the headliner board. Similarly, apply adhesive to the backside of the headliner fabric.
- Install the new headliner fabric: Carefully position the headliner fabric onto the adhesive-covered board, starting from one side and working your way across. Smooth out any wrinkles or bubbles as you go along, ensuring the fabric adheres firmly to the board.
- Secure the edges: Use masking tape or clips to hold the edges of the headliner fabric in place until the adhesive dries completely. This will ensure a tight and wrinkle-free finish.
- Reinstall the trim and accessories: Once the adhesive has dried, reattach the trim pieces and any accessories you removed in the first step. Make sure everything is securely in place.
And there you have it! By following these step-by-step instructions, you can easily install new headliner material and revitalize the look of your car’s interior. Remember, take your time and be patient during the process to achieve the best results.
Method 4: Using Pins Or Clips
Overview Of Using Pins Or Clips For A Temporary Fix
A sagging headliner can be a frustrating and unsightly problem in any vehicle. If you’re looking for a quick and easy temporary fix, using pins or clips can be a great option. This method involves securing the sagging headliner back to the roof of your vehicle using either pins or clips.
Here’s an overview of using pins or clips for a temporary fix:
- Secure the sagging headliner: By using pins or clips, you can secure the sagging headliner back to the roof of your vehicle. This method helps prevent the headliner from hanging down and obstructing your view while driving.
- Easy application: Using pins or clips is a simple process that most people can do on their own. All you need is the right type of pins or clips and a steady hand.
- Cost-effective solution: This method is a cost-effective temporary fix for a sagging headliner. Pins and clips are affordable and readily available at most automotive supply stores.
Proper Placement And Selection Of Pins Or Clips
To effectively fix your sagging headliner using pins or clips, it’s important to know the proper placement and selection of these materials. Here are some key points to consider:
- Proper placement: The first step is to identify the areas of your headliner that need to be secured. Locate the corners or edges of the sagging headliner and mark them for placement.
- Pin selection: If you choose to use pins, select ones that are specifically designed for securing headliners. These pins typically have a flat head that won’t damage the headliner material. Make sure to choose the appropriate length of pins based on the thickness of your headliner.
- Clip selection: Clips can also be a good option for securing your sagging headliner. Look for clips that are sturdy but won’t damage the headliner material. Clips with adhesive backing are a convenient choice as they eliminate the need for drilling or additional tools.
- Proper installation: When installing the pins or clips, ensure they are placed securely into the headliner and the roof of your vehicle. Take care not to pierce any wires, roof lining, or airbags that may be present.
Potential Drawbacks And Limitations Of This Method
While using pins or clips can provide a temporary fix for a sagging headliner, it’s important to understand the potential drawbacks and limitations of this method. Here are a few things to be aware of:
- Limited effectiveness: While pins or clips can help temporarily hold up a sagging headliner, they may not provide a permanent solution. Over time, the headliner may begin to sag again, requiring additional fixes or a more permanent solution.
- Aesthetic concerns: Pins or clips may not be the most visually appealing solution for a sagging headliner. They can be visible and may not blend seamlessly with the interior of your vehicle.
- Potential damage: Improper installation or the use of incorrect pins or clips can potentially cause damage to the headliner or the roof of your vehicle. Take care when installing and make sure to use the appropriate materials and techniques.
- Safety considerations: Keep in mind that using pins or clips may interfere with airbag deployment in the event of an accident. Carefully consider the potential safety implications before proceeding with this method.
While using pins or clips can be a quick and affordable solution for a sagging headliner, it’s essential to weigh the drawbacks and consider whether a more permanent fix or professional assistance might be necessary.
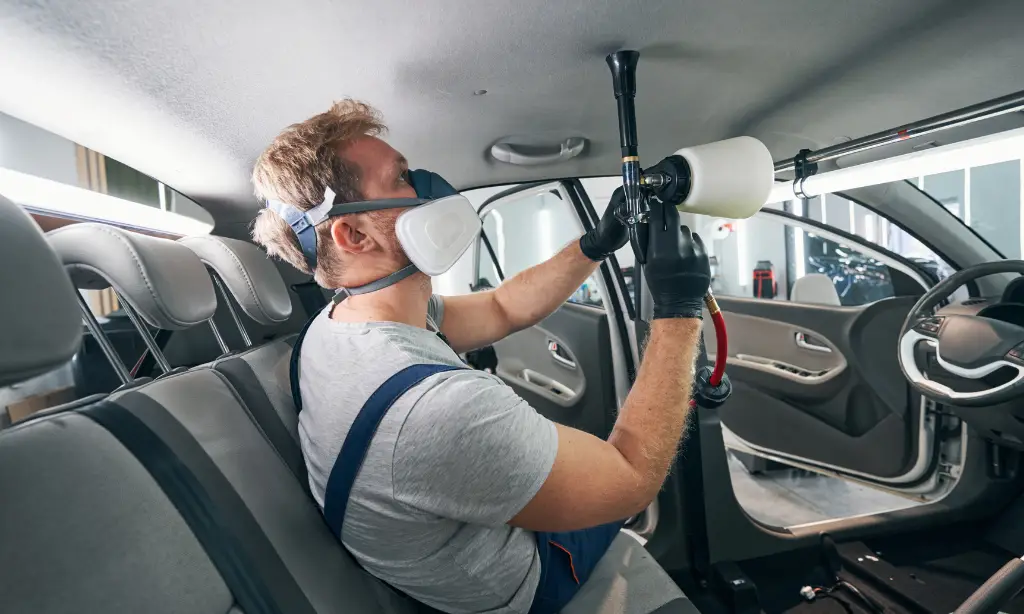
Method 5: Seeking Professional Help
Is your sagging headliner in need of some expert fixing? While the previous methods mentioned in this blog post can be effective in diy headliner repair, there are instances where seeking professional help becomes necessary. In this section, we will explore the signs that indicate the need for professional assistance, the benefits of hiring a professional for headliner repair, and how to find a reliable and experienced headliner repair service.
Signs That Indicate The Need For Professional Assistance
Sometimes, the extent of damage or complexity of the headliner issue may require the skills and expertise of a professional. Here are some signs that indicate it’s time to call in the experts:
- Extensive damage: If your headliner is severely damaged, with extensive tears, rips, or detachment that seem beyond your capability to repair, it’s best to let a professional handle it.
- Lack of experience: If you have never attempted headliner repairs before or lack the necessary tools and knowledge, it’s wise to reach out to a professional who can ensure a successful repair without causing further damage.
- Time constraints: If you have a busy schedule or lack the time required for a diy repair, hiring a professional can save you valuable time and effort.
- Safety concerns: If the sagging headliner is obstructing your view or causing distractions while driving, it’s essential to have it fixed professionally to ensure your safety on the road.
Benefits Of Hiring A Professional For Headliner Repair
When it comes to headliner repair, entrusting the task to a professional offers numerous advantages:
- Expertise and experience: Professional headliner repair experts have the necessary knowledge and experience to diagnose the issue accurately and choose the most effective repair techniques.
- Quality materials: Professionals often have access to high-quality materials that may not be readily available to the average diyer, ensuring a long-lasting and durable repair.
- Time and convenience: Hiring a professional means you can sit back and relax while they take care of the repair. This frees up your time and ensures a hassle-free experience.
- Guaranteed results: Professionals take pride in their work and typically offer warranty or guarantees on the repairs they perform. This provides peace of mind, knowing that any issues will be resolved promptly and effectively.
How To Find A Reliable And Experienced Headliner Repair Service
To ensure you find a skilled and reliable professional for your headliner repair needs, consider the following tips:
- Research and compare: Start by researching local headliner repair services in your area. Look for reviews and testimonials to gauge their reputation and reliability.
- Ask for recommendations: Reach out to friends, family, and colleagues who may have previously used headliner repair services and ask for their recommendations.
- Check credentials: Look for professionals who are certified or hold relevant qualifications in automotive upholstery or interior restoration.
- Get multiple quotes: Obtain quotes from different headliner repair services and compare their prices, services offered, and turnaround times. Remember to inquire about any warranties they provide.
- Request references: Don’t hesitate to ask for references from previous customers. Speaking with past clients can give you valuable insights into the quality of their work.
Finding the right professional for your headliner repair ensures you receive top-notch service and restores your vehicle’s interior to its former glory.
Remember, while diy methods can be effective for minor repairs, seeking professional help is the best course of action when you encounter significant damage, lack experience, are short on time, or want guaranteed results. Take the time to find a reliable and experienced headliner repair service to ensure a successful and long-lasting fix for your sagging headliner.
Conclusion
To sum up, fixing a sagging headliner doesn’t have to be a daunting task. With the five quick methods mentioned in this blog post, you can easily restore the appeal and functionality of your car’s interior. Whether you choose to use adhesive spray, fabric glue, fishing line, push pins, or upholstery tacks, each method provides a viable solution for tackling a sagging headliner.
By following the step-by-step instructions and tips provided, you can confidently take on this project and achieve professional-looking results. Remember to start by preparing the area, removing the old fabric, applying the chosen method, and allowing sufficient drying time. Don’t let a sagging headliner ruin your driving experience any longer – take action today and enjoy a refreshed and revitalized car interior that looks as good as new.
- Why Are My Car Headlights Not Bright Enough? - May 9, 2024
- How Long Can You Drive With An EVAP Leak? - May 9, 2024
- What Does B Stand for in a Car? [Full Guide] - May 9, 2024