How to Easily Test for Bad Gasoline: Simple Methods Revealed
To test for bad gasoline, check for visual signs of contamination and conduct a fuel test. In the following article, we will cover these methods and provide you with insights on how to identify and deal with bad gasoline effectively.
Gasoline is a vital fuel source for millions of vehicles around the world. However, occasionally you may encounter gasoline that is contaminated or of poor quality. Using bad gasoline can lead to engine damage and performance issues in your vehicle.
Therefore, it is essential to be able to recognize and test for bad gasoline. We will explore how to detect bad gasoline through visual inspections and fuel testing methods. By following these guidelines, you can ensure that you are using high-quality gasoline, allowing your vehicle to operate at its optimal level of performance and efficiency. So let’s dive in and learn how to test for bad gasoline effectively.
Understanding The Importance Of Testing For Bad Gasoline
Bad gasoline can have a significant impact on the performance of your vehicle. It is important to understand why testing for bad gasoline is crucial to avoid potential risks and damage. In this section, we will explore why bad gasoline can affect the performance of your vehicle and the potential risks and damage it can cause.
Why Bad Gasoline Can Affect The Performance Of Your Vehicle
- Poor combustion: Bad gasoline may contain impurities, such as water or contaminants, which can affect the combustion process in your engine. This can lead to misfires, reduced power output, and a decrease in fuel efficiency.
- Engine deposits: Low-quality gasoline can leave behind deposits on your engine components, such as fuel injectors and valves. Over time, these deposits can restrict the flow of fuel and air, resulting in decreased engine performance.
- Clogged fuel system: Bad gasoline may contain sediments or debris that could clog your vehicle’s fuel filter, resulting in fuel starvation to the engine. This can cause rough idling, stalling, or even complete engine failure.
- Increased wear and tear: The presence of impurities in bad gasoline can lead to increased friction and wear on crucial engine parts, including cylinder walls and piston rings. This can result in costly repairs and decreased engine longevity.
- Emission control system issues: Contaminated fuel can also negatively impact your vehicle’s emission control system, leading to increased emissions and potential failure to meet environmental standards. This could result in failed emissions tests and the need for repairs or replacements.
The Potential Risks And Damage Caused By Bad Gasoline
- Engine damage: Bad gasoline can cause severe damage to vital engine components, including the fuel pump, fuel injectors, and spark plugs. This requires expensive repairs or replacements and could leave you stranded on the side of the road.
- Reduced fuel efficiency: Using bad gasoline can significantly decrease your vehicle’s fuel efficiency. As a result, you may find yourself making more frequent trips to the gas station and spending more money on fuel than necessary.
- Poor performance: Vehicles running on bad gasoline may experience rough idling, hesitation during acceleration, and a general lack of power. This can affect your overall driving experience and make your vehicle less enjoyable to drive.
- Increased maintenance costs: The negative effects of bad gasoline on your vehicle can lead to increased maintenance and repair costs. Regularly using contaminated fuel may require more frequent oil changes, fuel system cleanings, and overall engine maintenance.
- Safety concerns: A vehicle running on bad gasoline may not respond as expected in critical situations, such as sudden acceleration or emergency braking. This can raise safety concerns for both the driver and other road users.
As a responsible vehicle owner, it is essential to understand the importance of testing for bad gasoline. Regularly monitoring the quality of the fuel you use can help prevent potential risks, ensure optimal engine performance, and save you from expensive repairs in the long run.
Visually Inspecting Gasoline For Signs Of Contamination
Checking For Water Or Sediment In The Gasoline
One of the key ways to visually inspect gasoline for signs of contamination is to check for the presence of water or sediment. Here are some points to consider:
- Observe any separation between water and gasoline: Gently tilt the container back and forth to check whether there is a noticeable separation between water and gasoline. Water droplets will appear as clear or cloudy liquid and are usually found at the bottom of the container.
- Look for sediment or particles: Carefully examine the gasoline for any solid particles or sediment. Sediment can indicate the presence of impurities or debris that may cause engine issues if consumed. Sediment may appear as tiny granules or flakes floating in the gasoline.
- Consider using a water finding paste: If you suspect the presence of water in the gasoline, you can use a water finding paste. Apply a small amount of the paste to a long stick or dipstick and then insert it into the gasoline. The paste will change color if it detects water.
Remember, the presence of water or sediment in gasoline can lead to engine problems, so it’s essential to visually inspect the gasoline before using it.
Observing Unusual Color Or Odor In The Gasoline
Apart from water and sediment, it’s crucial to pay attention to any unusual color or odor in the gasoline. Here are a few things to keep in mind:
- Detecting abnormal color: Gasoline should typically have a clear, pale yellow color. If the gasoline appears cloudy or has a different color, such as brown or green, it may indicate contamination or the presence of impurities.
- Identifying unusual odor: Gasoline has a distinct smell, but if you notice a strong, foul, or different odor, it could be a sign of contamination. Odors like rotten eggs, sulfur, or a pungent chemical smell should raise a concern.
Inspecting the color and odor of gasoline helps in determining its quality and potential for engine issues. If you find any abnormalities, it is advisable to seek professional help or find a reputable gas station to refill your tank.
Remember, maintaining fuel quality is crucial for the overall performance and longevity of your vehicle. It’s essential to visually inspect gasoline for signs of contamination regularly to prevent any potential problems.
Conducting A Water Separation Test
Explaining The Purpose Of A Water Separation Test
Gasoline can sometimes contain traces of water due to a variety of factors such as condensation, leakage, or improper storage. Water-contaminated gasoline can lead to engine damage and performance issues. Conducting a water separation test allows you to determine if there is any water present in your gasoline.
This test helps to ensure that you are filling up your vehicle with clean and good-quality fuel, reducing the risk of potential problems down the line.
Step-By-Step Instructions On How To Perform The Test
To conduct a water separation test on your gasoline, follow these simple steps:
- Gather the necessary materials:
- A clear, transparent container (preferably with a lid)
- Gasoline sample (approximately one cup)
- Water separation additive (available at automotive supply stores)
- Gloves and safety goggles (optional but recommended for protection)
- Start by pouring the gasoline sample into the clear container, leaving some space at the top.
- Carefully add the water separation additive to the container as per the instructions provided on the additive’s packaging. This additive helps to separate any water from the gasoline.
- Securely close the lid of the container and gently invert it a few times to mix the gasoline and the additive.
- Allow the container to settle for a few minutes. During this time, gravity will cause the water to separate and sink to the bottom of the container, while the gasoline remains on top.
- After the settling period, carefully observe the container. Look for the presence of any water accumulation at the bottom.
- Check for a distinct line or interface between the gasoline and the water. If water is present, it will appear at the bottom of the container and could vary in color or clarity from the gasoline layer.
- If there is a visible separation of water, it indicates the presence of water in the gasoline. This signals that the gasoline may be contaminated and not suitable for use.
Interpreting The Results And What They Indicate
The results obtained from the water separation test provide valuable information about the quality of the gasoline. Here’s what the results may indicate:
- No water separation: If there is no evidence of water accumulation, it suggests that the gasoline is free from water contamination. You can confidently use the gasoline in your vehicle and expect optimal performance.
- Presence of water separation: If water is present at the bottom of the container, it indicates that the gasoline is contaminated. It is crucial to avoid using this gasoline as it can cause damage to your vehicle’s engine and affect its overall performance.
Regularly performing water separation tests can help you identify potential issues with your fuel and ensure that you are using clean and reliable gasoline for your vehicle. By following these simple steps and interpreting the results correctly, you can safeguard the health and performance of your vehicle’s engine.
Performing A Octane Level Test
The Significance Of Octane Levels In Gasoline
Octane levels play a vital role in determining the quality and performance of gasoline. Higher octane levels indicate a better quality fuel, which in turn enhances the performance of the engine. Here are a few key points to understand the significance of octane levels in gasoline:
- Octane rating measures a fuel’s resistance to knocking or pinging in an internal combustion engine.
- Knocking occurs when the air-fuel mixture in the engine ignites prematurely due to high compression or excessive temperature.
- Higher octane levels prevent knocking and allow for more efficient combustion, resulting in improved engine performance.
- High-performance engines and vehicles with turbochargers or superchargers often require gasoline with higher octane ratings.
- Using gasoline with a lower octane level than recommended can lead to engine damage, reduced fuel efficiency, and decreased power output.
Methods For Testing The Octane Level Of Gasoline
To determine the octane level of gasoline accurately, several methods can be employed. Here are some commonly used techniques:
- Research octane number (ron) test: This is the most widely used method, primarily used in europe and most parts of the world. The ron value represents the fuel’s resistance to knocking under standard conditions.
- Motor octane number (mon) test: This test measures the fuel’s knocking resistance at higher temperatures and engine speeds. A combination of ron and mon values usually represents the octane number displayed at gas stations.
- Road octane test: This method involves performing in-vehicle tests with various fuel samples to evaluate their performance and eliminate engine knocking.
- Knouwenberg-koehler engine test: An industry-standard test method used to measure the octane rating of gasoline. It involves operating an engine under controlled conditions and analyzing any knocking events.
Analyzing The Results And Their Implications
Once you have conducted the octane level test, it is crucial to analyze the results and understand their implications. Here are a few points to consider:
- Compare the octane rating of the tested gasoline with the recommended rating for your vehicle to determine if it meets the required specifications.
- If the tested octane rating is lower than recommended, it is advisable to use a higher octane fuel to avoid engine knocking and ensure optimal performance.
- In case the tested octane rating exceeds the recommended level, using a higher octane fuel may not provide any additional benefits and could be an unnecessary expense.
- It is essential to balance the octane rating with the specific requirements of your vehicle, such as the engine design, compression ratio, and manufacturer’s recommendations.
- Regularly testing the octane level of gasoline ensures the overall health and performance of your vehicle’s engine, allowing for timely adjustments if needed.
By understanding the significance of octane levels, utilizing appropriate testing methods, and analyzing the results accurately, you can make informed decisions when it comes to selecting the right gasoline for your vehicle. Remember to prioritize the octane level recommended by your vehicle manufacturer to ensure its longevity and optimal performance.
Using A Fuel Additive Test Kit
The Benefits Of Using A Fuel Additive Test Kit
A fuel additive test kit can be a valuable tool for diagnosing issues with your gasoline. Here are the key benefits of using a fuel additive test kit:
- Accurate detection: Fuel additive test kits are designed to detect various contaminants and impurities in gasoline, providing accurate results. This allows you to pinpoint the exact problem with your fuel.
- Cost-effective solution: Using a fuel additive test kit can save you money in the long run. By identifying issues early on, you can prevent potential damage to your engine, avoiding expensive repairs down the line.
- Easy to use: These test kits are designed for convenience and simplicity. You don’t need any technical expertise to use them. Just follow the instructions provided, and you’ll have your results in no time.
- Time-saving: Instead of relying on guesswork or trial and error, a fuel additive test kit provides quick and reliable results. This helps you save time by getting to the root of the problem faster.
Recommended Fuel Additive Test Kits On The Market
There are several fuel additive test kits available on the market. Here are a few highly recommended options:
- Fuel test kits: This brand offers a range of test kits specifically designed for gasoline analysis. Their kits are user-friendly, providing accurate results within minutes.
- Lucas oil fuel test kit: Lucas oil is a trusted brand in the automotive industry. Their fuel test kit is known for its accuracy and ease of use. It can detect issues such as water contamination and fuel stability.
- Otc 7100 deluxe fuel injection test kit: While primarily designed for fuel injection systems, this test kit can also be used for gasoline analysis. It comes with a variety of adapters and fittings for different vehicle models.
- Testo exhaust gas analyzer: This advanced test kit is ideal for professional mechanics or enthusiasts who want more comprehensive analysis. It measures various exhaust gas parameters, including carbon monoxide and oxygen concentration.
Step-By-Step Guide On Using A Fuel Additive Test Kit
Using a fuel additive test kit is a straightforward process. Here’s a step-by-step guide to help you:
- Start by reading the instructions provided with the test kit. Familiarize yourself with the equipment and safety precautions.
- Ensure that you have a representative sample of your gasoline. This can be obtained either directly from your fuel tank or by using a fuel sample container.
- Open the test kit and prepare it for use according to the manufacturer’s instructions. This may involve adding reagents or connecting the necessary components.
- Take your fuel sample and carefully introduce it into the designated slot or container provided with the test kit.
- Follow the instructions to initiate the testing process. This may involve shaking the kit, activating a chemical reaction, or using a digital reader.
- Allow the test kit to process the sample for the recommended duration, as specified by the manufacturer.
- Once the test is complete, read the results provided by the test kit. This can be in the form of color changes, numerical values, or digital display readings.
Interpreting The Results And Identifying Potential Issues
After conducting the fuel additive test, it’s important to interpret the results accurately. Here’s how to identify potential issues:
- Refer to the instruction manual or guide that accompanies the fuel additive test kit. It should explain how to interpret the test results specific to the kit you used.
- Look for any abnormal readings or significant deviations from the expected values. These can indicate potential issues with your gasoline, such as contamination or fuel quality problems.
- Compare the results with the recommended ranges or standards provided by the test kit manufacturer. This will help you determine whether the gasoline meets the required specifications.
- If the test indicates issues with the fuel, it’s advisable to consult with a professional mechanic or a fuel specialist for further analysis and recommendations.
Remember, using a fuel additive test kit is a valuable diagnostic tool, but it’s important to seek professional advice if you encounter significant problems with your gasoline.
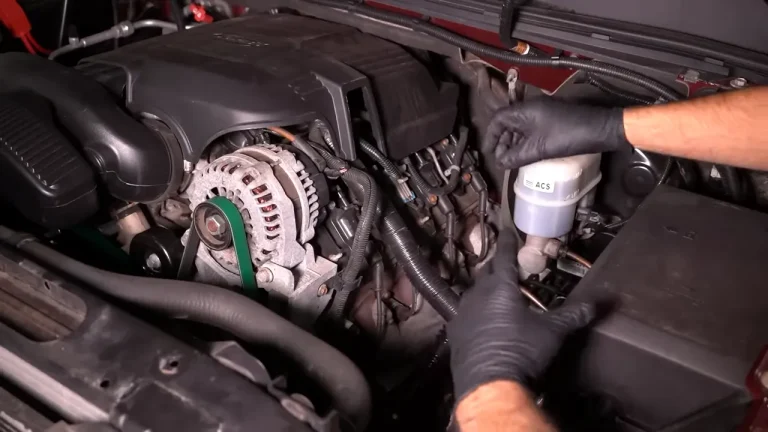
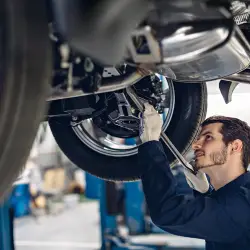
Consulting A Mechanic For Professional Analysis
Bad gasoline can wreak havoc on your vehicle’s fuel system, causing a host of problems like poor fuel efficiency, engine misfires, and even damage to critical components. While it’s possible to test for bad gasoline yourself, there are times when it’s best to consult a mechanic for a professional analysis.
In this section, we’ll explore when it’s necessary to seek professional assistance, how mechanics diagnose and test for bad gasoline, and when you should consider a fuel system flush or repair.
Knowing When To Seek Professional Assistance
Determining when to seek professional assistance for testing bad gasoline can save you time, money, and potential headaches. Here are a few key points to consider:
- Persistent issues: If you’ve been experiencing ongoing fuel-related problems despite trying diy fixes, it’s time to consult a mechanic. They have the expertise to diagnose and address the root cause efficiently.
- Unusual symptoms: Strange sounds, rough idling, or a sudden drop in fuel efficiency may be indicators of bad gasoline. A mechanic can analyze these symptoms and recommend the appropriate course of action.
- Check engine light: If your vehicle’s check engine light is illuminated, it could be related to fuel quality issues. A mechanic can run a diagnostic test to pinpoint the problem accurately.
- Safety concerns: While rare, contaminated gasoline can lead to safety hazards such as engine fires or fuel leaks. If you suspect your fuel has been compromised, it’s crucial to consult a professional immediately.
How Mechanics Diagnose And Test For Bad Gasoline
When you take your vehicle to a mechanic for a professional analysis, they employ various methods to diagnose and test for bad gasoline. Here are the primary techniques they use:
- Visual inspection: Mechanics visually examine the fuel for any visible contaminants like water, debris, or sediment. They may use specialized tools such as a fuel scope to closely inspect the gasoline.
- Fuel sample analysis: By taking a sample of your gasoline, mechanics can analyze its composition using equipment like a gas chromatograph. This analysis helps identify any impurities, contaminants, or degraded fuel components.
- Fuel pressure testing: Mechanics assess fuel pump functionality and pressure by connecting a fuel pressure gauge to your vehicle’s fuel system. Deviations from recommended pressure levels can indicate fuel quality issues.
- Fuel system component checks: Mechanics thoroughly inspect various fuel system components, such as fuel injectors, filters, and lines, to ensure they are functioning optimally. Any faulty or damaged components may contribute to bad gasoline-related problems.
When To Consider A Fuel System Flush Or Repair
After diagnosing bad gasoline, mechanics may recommend a fuel system flush or repair to address the issue effectively. Here are a few instances when this course of action is necessary:
- Contaminant buildup: If your fuel system has accumulated significant contaminants, a fuel system flush can help remove them. It involves thoroughly cleaning the fuel tank, lines, and injectors to ensure proper fuel flow.
- Fuel filter replacement: A clogged or dirty fuel filter can obstruct fuel flow and cause performance issues. Mechanics may suggest replacing the filter and potentially cleaning or replacing other affected components.
- Fuel injector cleaning: Over time, fuel injectors can become clogged due to bad gasoline. Mechanics can clean or rebuild the injectors, ensuring they deliver the right amount of fuel for optimal combustion.
- Fuel pump repair or replacement: In severe cases, bad gasoline can damage the fuel pump, requiring repairs or even a complete replacement. Mechanics will assess the pump’s condition and recommend the most appropriate solution.
Remember, your vehicle’s fuel system is intricate, and attempting complex repairs without professional expertise may exacerbate the problem. Consulting a mechanic not only ensures accurate diagnosis but also helps prevent further damage to your vehicle’s fuel system.
Conclusion
Testing for bad gasoline is an essential practice to ensure the smooth running of your vehicle. By following the steps outlined in this blog post, you can easily identify and verify any potential issues with the fuel you put in your tank.
Regularly checking for signs of bad gasoline, such as decreased fuel efficiency, engine misfires, or strange noises, will help you catch problems early on and prevent costly repairs down the line. Remember to use a testing kit and pay attention to any unusual smells, discoloration, or impurities in the fuel sample.
Maintaining a clean fuel system is crucial for maximizing your vehicle’s performance and longevity. With a proactive approach to testing for bad gasoline, you can rest assured that your vehicle will continue running smoothly and efficiently for years to come.
- Why Are My Car Headlights Not Bright Enough? - May 9, 2024
- How Long Can You Drive With An EVAP Leak? - May 9, 2024
- What Does B Stand for in a Car? [Full Guide] - May 9, 2024