
Rear Main Seal Leak Symptoms (Hidden Tips and Tricks)
A rear main seal leak can be identified by oil spots under the car and burning oil smell. The repair cost can range from $200 to $1500 depending on the extent of the damage and the type of vehicle.
A leaking rear main seal in a car’s engine can be a cause for concern. Not only can it lead to oil spots underneath the vehicle, but it can also result in a noticeable burning oil smell. Recognizing the symptoms of a rear main seal leak is crucial in order to address the issue promptly.
Additionally, understanding the potential repair costs associated with fixing this problem can help car owners prepare for the financial implications. We will discuss the symptoms of a rear main seal leak, explore the factors that influence repair costs, and provide some insight into possible solutions for this issue.
Understanding The Rear Main Seal
The rear main seal is a crucial component in the engine that helps to prevent oil leaks and maintain proper lubrication. It is located at the rear of the engine, where the engine crankshaft exits the engine block. Understanding the rear main seal and its function is essential for recognizing symptoms of a leak and addressing the issue promptly.
What Is A Rear Main Seal?
- The rear main seal is a circular seal made of specialized rubber or silicone material.
- Its purpose is to prevent engine oil from leaking out of the rear of the crankshaft and into the transmission or onto the ground.
- It is designed to withstand high temperatures, pressure, and rotational forces generated by the engine.
Importance Of The Rear Main Seal In Engine Function
The rear main seal plays a vital role in maintaining the overall health and performance of the engine. Here’s why it is important:
- Oil containment: The seal prevents oil leakage, ensuring that the engine oil stays inside the engine where it’s needed for lubrication.
- Preventing contamination: By sealing the crankshaft, it stops debris, dirt, and contaminants from entering the engine and causing damage.
- Reduced friction: Proper lubrication provided by the rear main seal helps minimize friction between the crankshaft and the bearing surfaces, resulting in smoother engine operation and longevity.
Key Factors That Contribute To Rear Main Seal Failure
Several factors can contribute to the failure of the rear main seal. These include:
- Wear and tear: Over time, the rear main seal can deteriorate due to continuous exposure to heat, fluid, and pressure, leading to cracks or tears.
- Improper installation: If the rear main seal is not installed correctly during engine assembly or repair, it may fail prematurely.
- Excessive crankshaft movement: Excessive crankshaft movement, often caused by worn engine bearings or misalignment, can put additional strain on the rear main seal.
- High oil pressure: Increased oil pressure, particularly in older engines, can cause the rear main seal to fail due to excessive stress.
Remember, early detection and prompt repair of a rear main seal leak can help prevent further damage to the engine and ensure its optimal performance. If you notice any symptoms of a leak, it is important to consult with a professional mechanic to assess the issue and determine the best course of action.
Identifying The Signs Of A Rear Main Seal Leak
Oil spots on the ground or garage floor:
- Look for oil stains or spots under your vehicle or in your garage. These spots may appear dark brown or black and have a strong oil smell.
- The size and frequency of the spots can vary, but if you notice consistent oil patches, it may indicate a rear main seal leak.
Excessive oil consumption:
- Pay attention to your oil levels. If you find yourself having to add oil frequently, it could be a sign of a rear main seal leak.
- Check your oil dipstick regularly to monitor the oil levels in your engine. If the oil level consistently drops, it may be a result of the leaking rear main seal.
Blue or white smoke from the exhaust:
- Blue or white smoke coming from the exhaust pipe can be a clear indication of an oil leak due to a faulty rear main seal.
- This smoke is usually the result of burning oil being expelled through the exhaust system. It’s important not to ignore this symptom, as it could lead to more severe engine problems if left unaddressed.
Unpleasant burning oil smell:
- If you notice a strong oil odor while driving or when your vehicle is parked, it could be a sign of a rear main seal leak.
- The leaking oil may come into contact with hot engine parts, causing a distinct burning oil smell. This smell may be particularly noticeable when the engine is running or when you first start the car.
Decline in engine performance:
- A rear main seal leak can lead to a decline in engine performance over time.
- The loss of oil can affect the lubrication of various engine components, causing increased friction and reduced efficiency. You may notice a decrease in power, acceleration, and overall engine performance.
It’s essential to be attentive to these signs as a rear main seal leak can lead to significant engine damage if not addressed promptly.
Diagnosing A Rear Main Seal Leak
Rear Main Seal Leak Symptoms And Repair Cost
When it comes to diagnosing a rear main seal leak in your vehicle, there are several methods that mechanics use to accurately identify the source of the problem. Here, we’ll discuss a few common diagnostic techniques that can help pinpoint whether you have a rear main seal leak or another issue causing oil leakage.
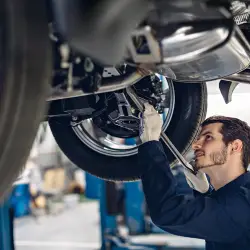
Visual Inspection
A visual inspection is usually the first step in diagnosing a rear main seal leak. During this process, the mechanic will closely examine the underside of your vehicle, specifically the area where the engine and transmission join. They will be on the lookout for any signs of oil leakage, such as:
- Oil spots or stains on the ground underneath the vehicle
- Oil accumulation around the rear of the engine block
- Wet or oily residue on the transmission bellhousing
If any of these visual indicators are present, it could be a strong indication of a rear main seal leak.
Using Dye To Detect The Source Of The Leak
To further confirm the presence of a rear main seal leak, mechanics may use a special dye. This dye is added to the engine oil, allowing it to flow through the affected area. By using a uv light, the mechanic can easily identify the exact location of the leak.
This method is particularly useful when the leak is not easily visible during a visual inspection.
Pressure Testing The Crankcase
Another effective diagnostic method is pressure testing the crankcase. Mechanics will use a special tool to pressurize the crankcase with air and then closely monitor for any decrease in pressure. If there is a significant drop in pressure, it could indicate a leak, including a rear main seal leak.
Other Diagnostic Methods Used By Mechanics
In addition to the above techniques, mechanics may also employ other diagnostic methods to determine if you have a rear main seal leak. These methods include:
- Using a borescope to inspect the internal components for signs of oil leakage
- Conducting a compression test to check for any abnormal pressure levels in the crankcase
- Using a smoke machine to detect any potential leaks in the crankcase or other parts of the engine
By employing these various diagnostic methods, mechanics can accurately identify the source of the leak and provide you with the most appropriate repair solution.
Remember, if you suspect a rear main seal leak in your vehicle, it’s crucial to have it diagnosed and repaired promptly to prevent further damage to your engine and ensure your safety on the road.
Assessing The Repair Expenses
Repairing a rear main seal leak in your vehicle is an essential maintenance task that shouldn’t be ignored. Addressing the issue promptly can help you avoid further damage to your engine and save you from costly repairs down the road.
In this section, we will explore the factors that influence the cost of rear main seal repair, the expenses associated with diy versus professional repairs, and any additional repairs that may be necessary.
Factors Influencing The Cost Of Rear Main Seal Repair
There are several factors that can influence the cost of repairing a rear main seal leak in your vehicle. These include:
- Vehicle make and model: The cost of repairing a rear main seal can vary depending on the make and model of your vehicle. Some models may have more accessible rear main seals, making the repair process easier and less expensive.
- Labor costs: The labor costs associated with rear main seal repair can vary based on your location and the expertise of the mechanic performing the repair. Labor costs tend to be higher at dealership service centers compared to independent auto repair shops.
- Type of repair: The cost can also depend on the type of repair needed. In some cases, a simple seal replacement may be sufficient, while in others, the entire rear main seal housing may need to be replaced.
- Additional parts required: If the leak has caused damage to other components in the engine, additional parts may be required for the repair. This can significantly increase the overall cost.
Diy Vs Professional Repair Costs
Deciding whether to tackle the rear main seal repair as a diy project or hire a professional can depend on your level of automotive expertise and the availability of tools. Here are some cost considerations for each option:
Diy repair costs:
- Lower upfront costs: Diy repairs can be more cost-effective as you only need to purchase the seal and any necessary tools.
- Risk of additional expenses: If the repair is not done correctly, it can lead to further damage and ultimately increase the repair costs. It is essential to have confidence in your abilities before attempting a diy repair.
Professional repair costs:
- Higher labor costs: Hiring a professional mechanic will likely result in higher overall repair costs due to labor charges.
- Assurance of quality work: Professionals have the expertise and experience to perform the repair correctly, reducing the risk of further damage to your vehicle.
Additional Repairs That May Be Necessary
When repairing a rear main seal leak, it’s important to consider any additional repairs that may be necessary for optimal engine performance. These can include:
- Crankshaft inspection and repair: If the rear main seal leak has caused damage to the crankshaft, it may need to be repaired or replaced to ensure proper functioning.
- Engine oil change: As the rear main seal leak can contaminate the engine oil, it may be necessary to perform an engine oil change as part of the repair process.
- Transmission removal: In some cases, the transmission may need to be removed to access the rear main seal for repair. This can add to the overall repair costs.
Ensuring that all necessary repairs are addressed during the rear main seal repair process will help prevent future issues and maintain the longevity of your vehicle’s engine.
Remember, addressing a rear main seal leak promptly is crucial to avoid further damage and costly repairs. Keeping an eye out for the symptoms and seeking professional help if needed can save you from extensive engine damage and ensure the optimal performance of your vehicle.
Diy Repair Options
Rear Main Seal Leak Symptoms And Repair Cost
If you’ve noticed oil spots or puddles forming under your car, it could be a sign of a rear main seal leak. This is a common issue in older vehicles or those with high mileage. Ignoring the problem can lead to more significant damage to your engine over time.
In this section, we will explore the diy repair options for a rear main seal leak, including temporary fixes and their limitations, the risks associated with diy repairs, and a step-by-step guide for replacing the rear main seal at home.
Temporary Fixes And Their Limitations
While a complete rear main seal replacement is the ideal solution for fixing a leak, there are temporary fixes you can try if you’re in a pinch. However, it’s important to note that these fixes are temporary and may not offer a long-term solution.
Here are some temporary fixes and their limitations:
- Stop leak additives: These additives claim to seal small leaks by softening and swelling the rear main seal. While they can provide a temporary fix, they may not be effective for larger leaks or seals that are severely damaged.
- Sealants: Another temporary fix is to apply a sealant directly to the rear main seal area. This can help seal minor leaks, but it’s not a permanent solution and may not work for more significant damage.
- Oil stabilizers: Oil stabilizers can help to rejuvenate o-rings and seals, potentially reducing leaks. However, they are not guaranteed to fix the problem entirely and may only offer a temporary solution.
Risks Associated With Diy Rear Main Seal Repairs
While attempting a diy repair for a rear main seal leak may seem like a cost-effective option, it’s essential to understand the risks involved. Here are some risks associated with diy rear main seal repairs:
- Lack of expertise: Rear main seal replacement can be a complex and challenging task. If you don’t have the necessary experience and knowledge, you could potentially make the problem worse or cause damage to other engine components.
- Time and effort: Replacing a rear main seal can be a time-consuming process, requiring specific tools and equipment. If you don’t have the time or patience to undertake this repair properly, it’s best to seek professional help.
- Warranty considerations: If your vehicle is under warranty, attempting a diy repair may void the warranty. It’s essential to check your vehicle’s warranty terms before proceeding with any repairs.
Step-By-Step Guide For Replacing The Rear Main Seal At Home
If you’re up for the challenge and have the required mechanical skills, replacing the rear main seal at home can be a rewarding project. Here is a step-by-step guide to help you through the process:
- Gather the necessary tools and parts: You’ll need a jack, jack stands, wrenches, gasket scraper, seal installer tool, and a new rear main seal.
- Prepare your vehicle: Lift your car using the jack and secure it with jack stands. Drain the engine oil and remove the oil pan and rear main seal housing.
- Remove the old seal: Carefully pry out the old rear main seal using a gasket scraper or seal remover tool. Be cautious not to damage the surrounding components.
- Clean the sealing surface: Use a gasket scraper to clean the sealing surface thoroughly, removing any old gasket material or debris.
- Install the new seal: Apply a thin layer of engine oil to the new rear main seal and carefully insert it into the seal bore. Use a seal installer tool to ensure it is properly seated.
- Reassemble the components: Replace the rear main seal housing and oil pan, ensuring all bolts are tightened to the manufacturer’s specifications. Refill the engine with fresh oil.
- Start the engine and check for leaks: Start your vehicle and inspect for any signs of leaks. If everything seems fine, lower your car and take it for a test drive to confirm the repair.
Recommended Tools And Precautions For A Successful Diy Repair
To ensure a successful diy repair, it’s vital to have the right tools and take necessary precautions. Here are some recommended tools and precautions:
- Tools: Jack, jack stands, socket set, torque wrench, gasket scraper, seal installer tool, and a new rear main seal.
- Safety precautions: Always park your vehicle on a flat and stable surface. Use jack stands to secure your car properly when working underneath. Wear protective gloves and safety glasses throughout the repair process.
- Service manual: Consult your vehicle’s service manual for specific instructions and torque specifications.
Remember, if you’re uncertain about your abilities or lack the tools required, it’s best to seek professional help to ensure the job is done correctly. Diy rear main seal repairs can be challenging, but with the right knowledge and precautions, you can save money and successfully fix the leak.
Professional Repair Options
Choosing The Right Mechanic Or Auto Repair Shop
When it comes to repairing a rear main seal leak, choosing the right mechanic or auto repair shop is crucial. Here are a few key points to consider:
- Ask for recommendations: Reach out to friends, family, or colleagues who have had similar repairs done. Their experiences will help you make an informed decision.
- Check online reviews: Read reviews on reliable platforms like google, yelp, or the better business bureau. Look for shops that have positive feedback and a reputation for quality work.
- Look for specialization: Find an auto repair shop that specializes in engine repair or specifically deals with rear main seal leaks. These specialists will have the expertise to diagnose and fix the issue correctly.
- Check for certifications: Look for certified technicians or mechanics who have the necessary training and qualifications. Certifications like ase (automotive service excellence) indicate a higher level of expertise.
- Get multiple quotes: Don’t settle for the first quote you receive. Shop around and compare prices from different repair shops. Ensure the quotes include all the necessary repairs, parts, and labor costs.
What To Expect During A Professional Rear Main Seal Repair
Understanding what to expect during a rear main seal repair will help you prepare for the process. Here’s a breakdown of the key points:
- Diagnosis: The first step is diagnosing the rear main seal leak. The mechanic will inspect the vehicle for oil leaks and perform a visual inspection of the engine components.
- Removing components: To access the rear main seal, the mechanic may need to remove various parts of the engine, such as the transmission or oil pan.
- Seal replacement: Once the technician reaches the rear main seal, they will remove the old seal and install a new one. This process requires precision and care to ensure a proper seal is achieved.
- Inspection and testing: After the repair, the mechanic will inspect for any additional leaks and conduct tests to ensure the new seal is functioning correctly.
- Reassembling: Once everything is confirmed to be in order, the mechanic will reassemble the removed components and perform a final check.
Estimated Costs For Professional Repair Services
The cost of a professional rear main seal repair can vary depending on factors such as the make and model of your vehicle and labor rates in your area. Here’s a rough estimate of what you can expect:
- The average cost of replacing a rear main seal ranges from $300 to $1,200.
- Parts cost: The rear main seal itself typically costs between $25 to $75, depending on the brand and quality.
- Labor cost: Labor charges usually range from $250 to $1,000, depending on the complexity of the repair and the shop’s hourly rate.
- Additional costs: Additional fees may apply if other components need to be replaced or if the repair requires extensive engine disassembly.
- It’s important to note that these estimates are approximate and may vary significantly based on your specific circumstances. It’s best to obtain quotes from reputable repair shops for an accurate cost assessment.
Warranty And Guarantees Offered By Reputable Repair Shops
When choosing a repair shop for your rear main seal repair, it’s essential to consider the warranty and guarantees they offer. Here are some points to look out for:
- Parts warranty: Reputable repair shops often provide a warranty on the parts used, which can range from 90 days to a year. This ensures that any defective parts will be replaced at no additional cost.
- Labor warranty: A trustworthy repair shop should also offer a warranty on their labor, typically ranging from 30 days to a year. This guarantees that if any issues arise due to poor workmanship, the repairs will be rectified at no charge.
- Clear terms and conditions: It’s crucial to read and understand the terms and conditions of the warranty or guarantees provided. Pay attention to any limitations, exclusions, or requirements that may affect the coverage.
- Reputation and trustworthiness: Choose a repair shop with a solid reputation and positive customer reviews. This ensures that they are likely to honor their warranty commitments and provide reliable service.
By considering these aspects, you can select a repair shop that not only offers competitive pricing but also provides peace of mind through their warranty and guarantees.
Preventive Maintenance And Care
Rear Main Seal Leak Symptoms And Repair Cost
Regular engine and oil inspections:
- Conducting regular inspections of your engine and oil can help detect any potential issues with the rear main seal before they become major problems.
- Look for signs of oil leaks or drips underneath your vehicle, as this could indicate a rear main seal leak.
- Pay attention to any unusual noises or vibrations coming from your engine, as this could also be a symptom of a failing rear main seal.
Importance of routine oil changes:
- Regularly changing your engine oil is crucial for maintaining the health of your rear main seal.
- Over time, old and dirty oil can cause the seal to deteriorate, leading to leaks and potential engine damage.
- Following the manufacturer’s recommended oil change intervals is essential to prevent rear main seal failures.
Using high-quality engine oil and additives:
- Using high-quality engine oil can significantly prolong the life of your rear main seal.
- Look for oil that meets the manufacturer’s specifications and has the necessary additives to provide optimal lubrication and seal protection.
- Consider using specific additives that are designed to condition and rejuvenate seals, helping to prevent leaks and extend seal life.
Best practices for maintaining a healthy rear main seal:
- Avoid excessive idling or revving your engine, as this can put unnecessary stress on the rear main seal.
- Keep your engine properly tuned and maintained, as a poorly running engine can lead to increased pressure on the seal.
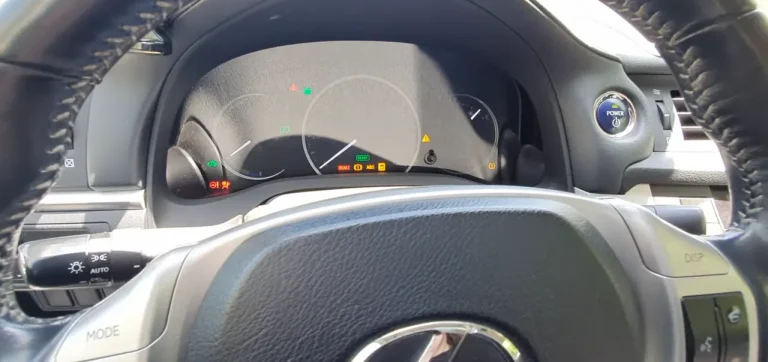
- Be mindful of any changes in your vehicle’s performance or any warning lights indicating potential issues with the rear main seal.
- Regularly checking and maintaining the levels of oil and other fluids in your vehicle can help prevent rear main seal leaks.
By implementing these preventive maintenance measures and taking care of your rear main seal, you can avoid costly repairs and potential engine damage. Stay proactive in inspecting your engine and keeping up with routine maintenance to ensure the longevity of your rear main seal and the overall health of your vehicle.
Conclusion
To sum up, it’s important to be aware of the symptoms of a rear main seal leak in your vehicle. These can include oil spots under the car, low oil levels, and a burning oil smell. If left unattended, this issue can lead to engine damage or even complete failure.
When it comes to repairing a rear main seal leak, the cost can vary depending on the make and model of your vehicle. However, it is generally an expensive repair due to the labor involved. It’s crucial to address this issue promptly to prevent further damage and expenses down the line.
Regularly checking for any signs of a rear main seal leak and addressing it as soon as it’s detected will help keep your engine running smoothly and prolong the life of your vehicle.
- Why Are My Car Headlights Not Bright Enough? - May 9, 2024
- How Long Can You Drive With An EVAP Leak? - May 9, 2024
- What Does B Stand for in a Car? [Full Guide] - May 9, 2024

![How to Safely Dispose of Old Gasoline [Step by Step Guide]](https://automhelp.com/wp-content/uploads/2023/07/Dispose-of-Old-Gasoline-768x461.png)
![How to Remove Paint Transfer And Scuffs From Cars [Expert Solutions]](https://automhelp.com/wp-content/uploads/2023/07/Remove-Paint-768x461.png)