Welcome to the fabulous world of retro living rooms, where nostalgia dances hand-in-hand with modern elegance! If you’re dreaming of infusing your space with vintage charm while keeping it ultra-comfy, you’re in for a treat. Today, we’re diving headfirst into a treasure trove of stylish ideas that transform your living room into a cozy mid century oasis bursting with imagination. Let’s unleash the creative genius within you!
First things first, consider the staple of midcentury design – those stunning furniture pieces! Think funky chairs, sleek sofas, and unique coffee tables that harken back to the groovy era while remaining fresh and relevant for today’s lifestyle. The key is to choose statement pieces that anchor your room without overwhelming it. After all, your living room is meant to feel like a retreat, not an episode of a design competition show!
Next, set the mood with retro-inspired color palettes. Rich, warm hues paired with some bold, graphic patterns can turn your space into a stunning visual delight. How about a pop of mustard yellow or a deep teal? These colors scream retro without feeling outdated. You can easily accessorize with cozy textiles that echo that mid-century vibe, giving your living room the perfect amount of flair. A charming throw blanket draped over the sofa, perhaps? Yes, please!
Also, let’s chat about the magic of merging retro with a touch of the boho spirit! Adding indoor plants, handmade decor, or playful wall art asserts your personality while keeping it cozy and inviting. Picture vintage posters, quirky trinkets, and soft layers of cotton or wool – the combination creates an open and airy feel. Embracing your whimsical side will result in a living room that feels beautifully curated!
In summary, your living room can be a delightful blend of retro and modern influences where laughter, relaxation, and creativity abound. By mixing iconic midcentury pieces with organic and playful decor, you construct a unique space that reflects you and your stories. So grab those paintbrushes, kick that decorating adventure into high gear, and let’s create a cozy living room that’s nothing short of spectacular!
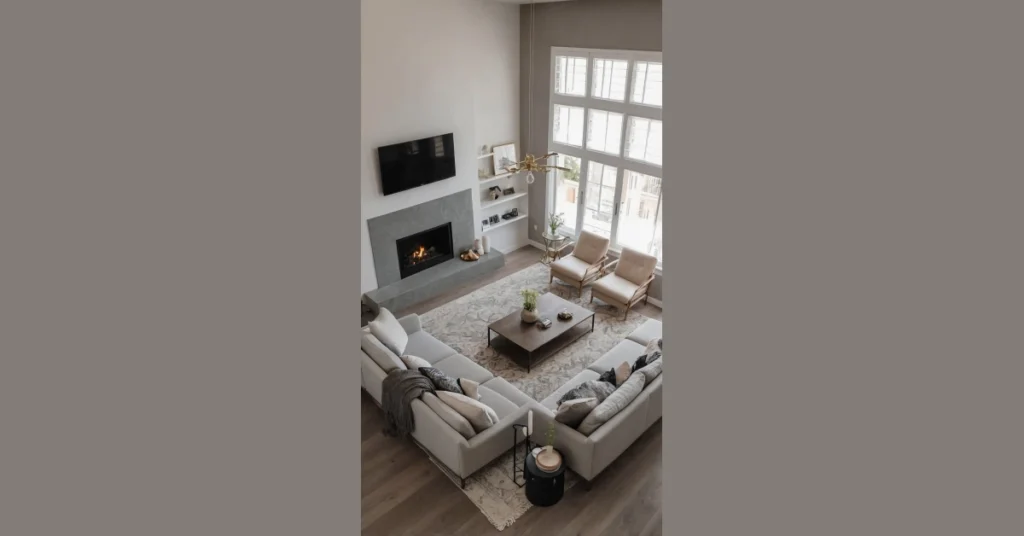
#1 Sleek Serenity Hub
Looking at this living room, you can practically hear the collective sigh of relief from every tired teenager who’s ever just wanted to melt into a couch. This isn’t just a sofa; it’s a beige, fluffy cloud of pure relaxation, perfectly angled for prime TV viewing. That huge wall-mounted screen is basically begging for a Netflix marathon or a serious gaming session. Plus, with those fancy hidden lights, you could probably even find the remote that inevitably gets lost in the cushions – now that’s a modern miracle!
This space is so sleek, you might feel a sudden urge to clean your own room (don’t worry, it’ll pass). Notice that super cool coffee table, ready to hold your snacks (or maybe just those candles that make everything look fancy). It’s the kind of place where you could actually *pretend* to study, then accidentally fall asleep surrounded by perfectly placed decorative branches, feeling totally zen. It’s definitely got that “adulting, but make it comfy” vibe down pat.
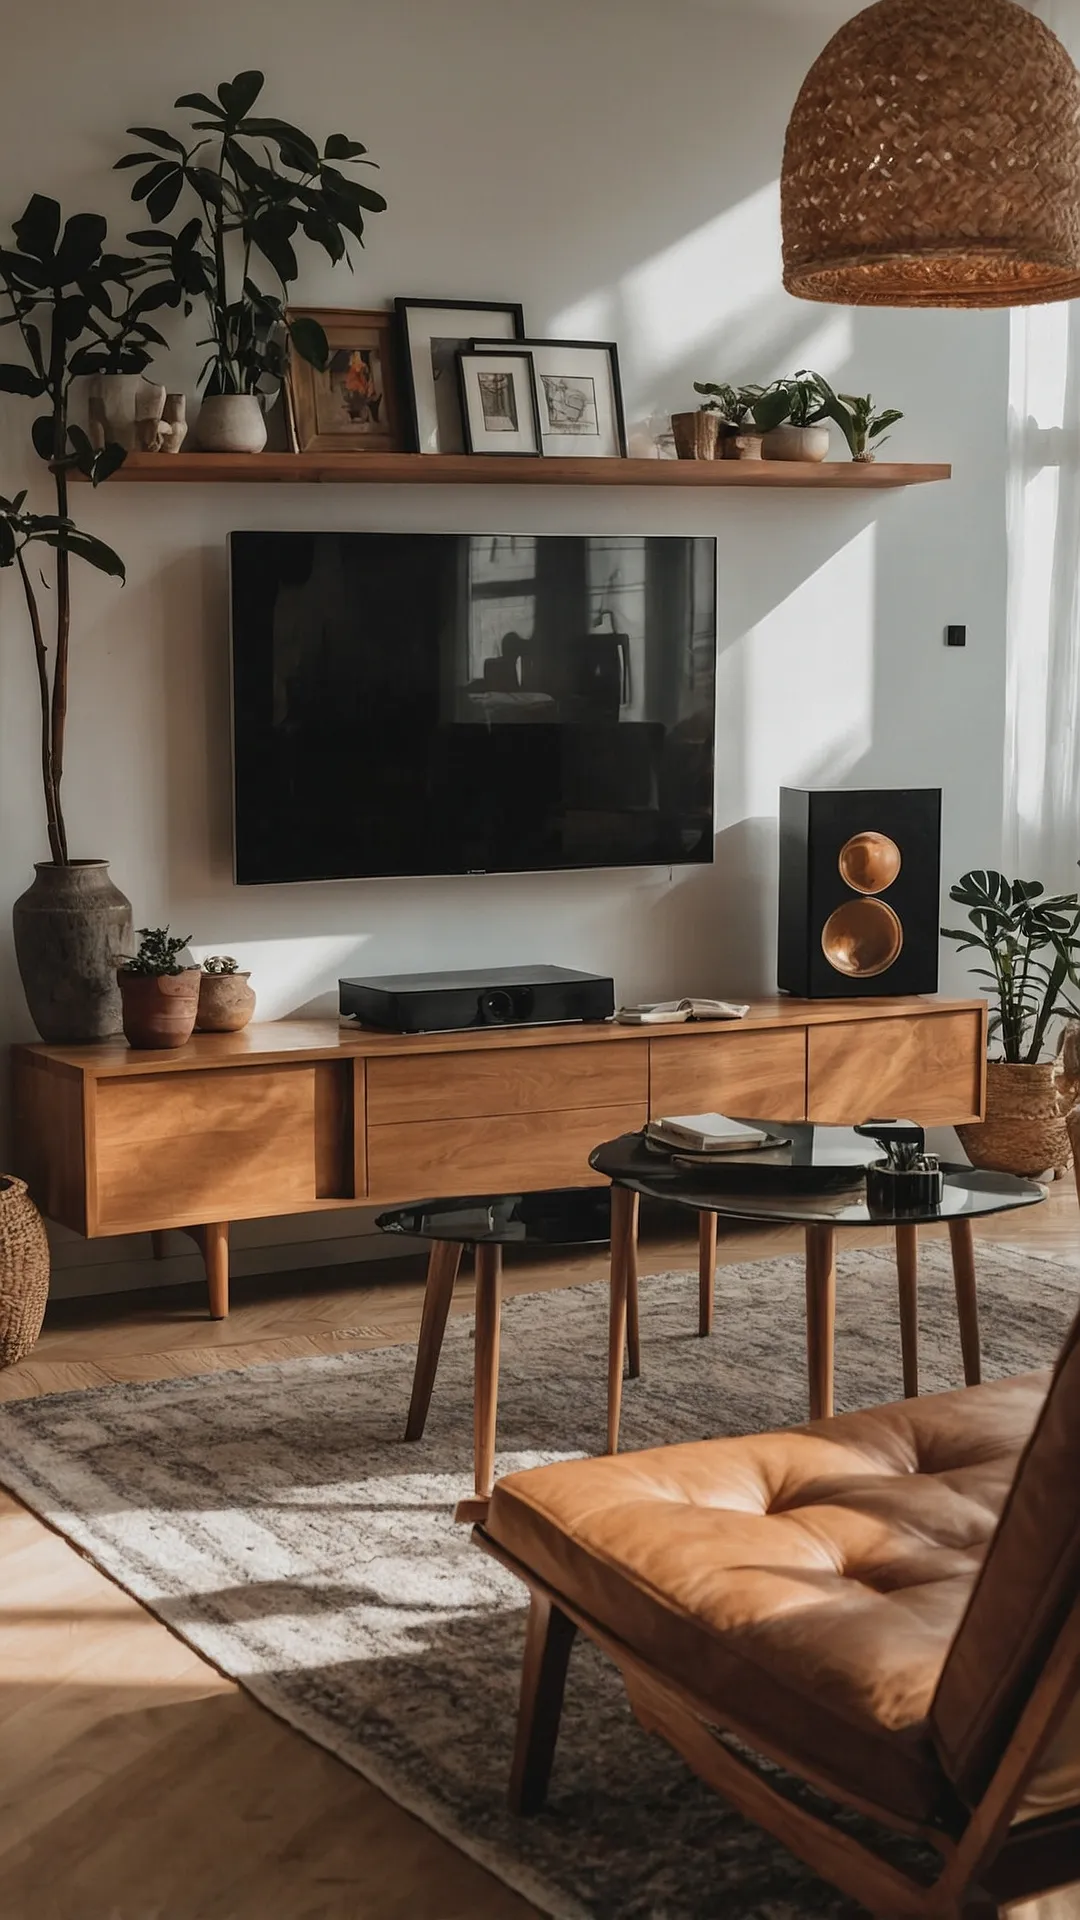
#2 Vibe Curator’s Nook

This modern living room looks like it’s straight out of a magazine, but way cooler! It’s got more plants than a jungle gym, and they all seem to be thriving. You can almost hear them whispering about how much sun they’re getting. And that sleek black speaker with the gold accents? It’s practically begging to blast your favorite tunes, though the plants probably prefer some chill, ambient spa music. This room isn’t just a place to hang out; it’s where good vibes (and excellent photosynthesis) happen!
That comfy-looking leather chair practically screams, “Come sit down and ignore your responsibilities!” After a tough day, you just know it’s ready to perfectly cradle you while you catch up on TikToks or epic movies on that super sleek TV. And check out those cool nesting tables – perfect for holding your snacks and drinks, just try not to get any crumbs on that stylish rug! This whole modern living room screams “peak chill,” so much so you’d almost be afraid to mess it up… almost. Who wants to bet it never actually stays this tidy for long?
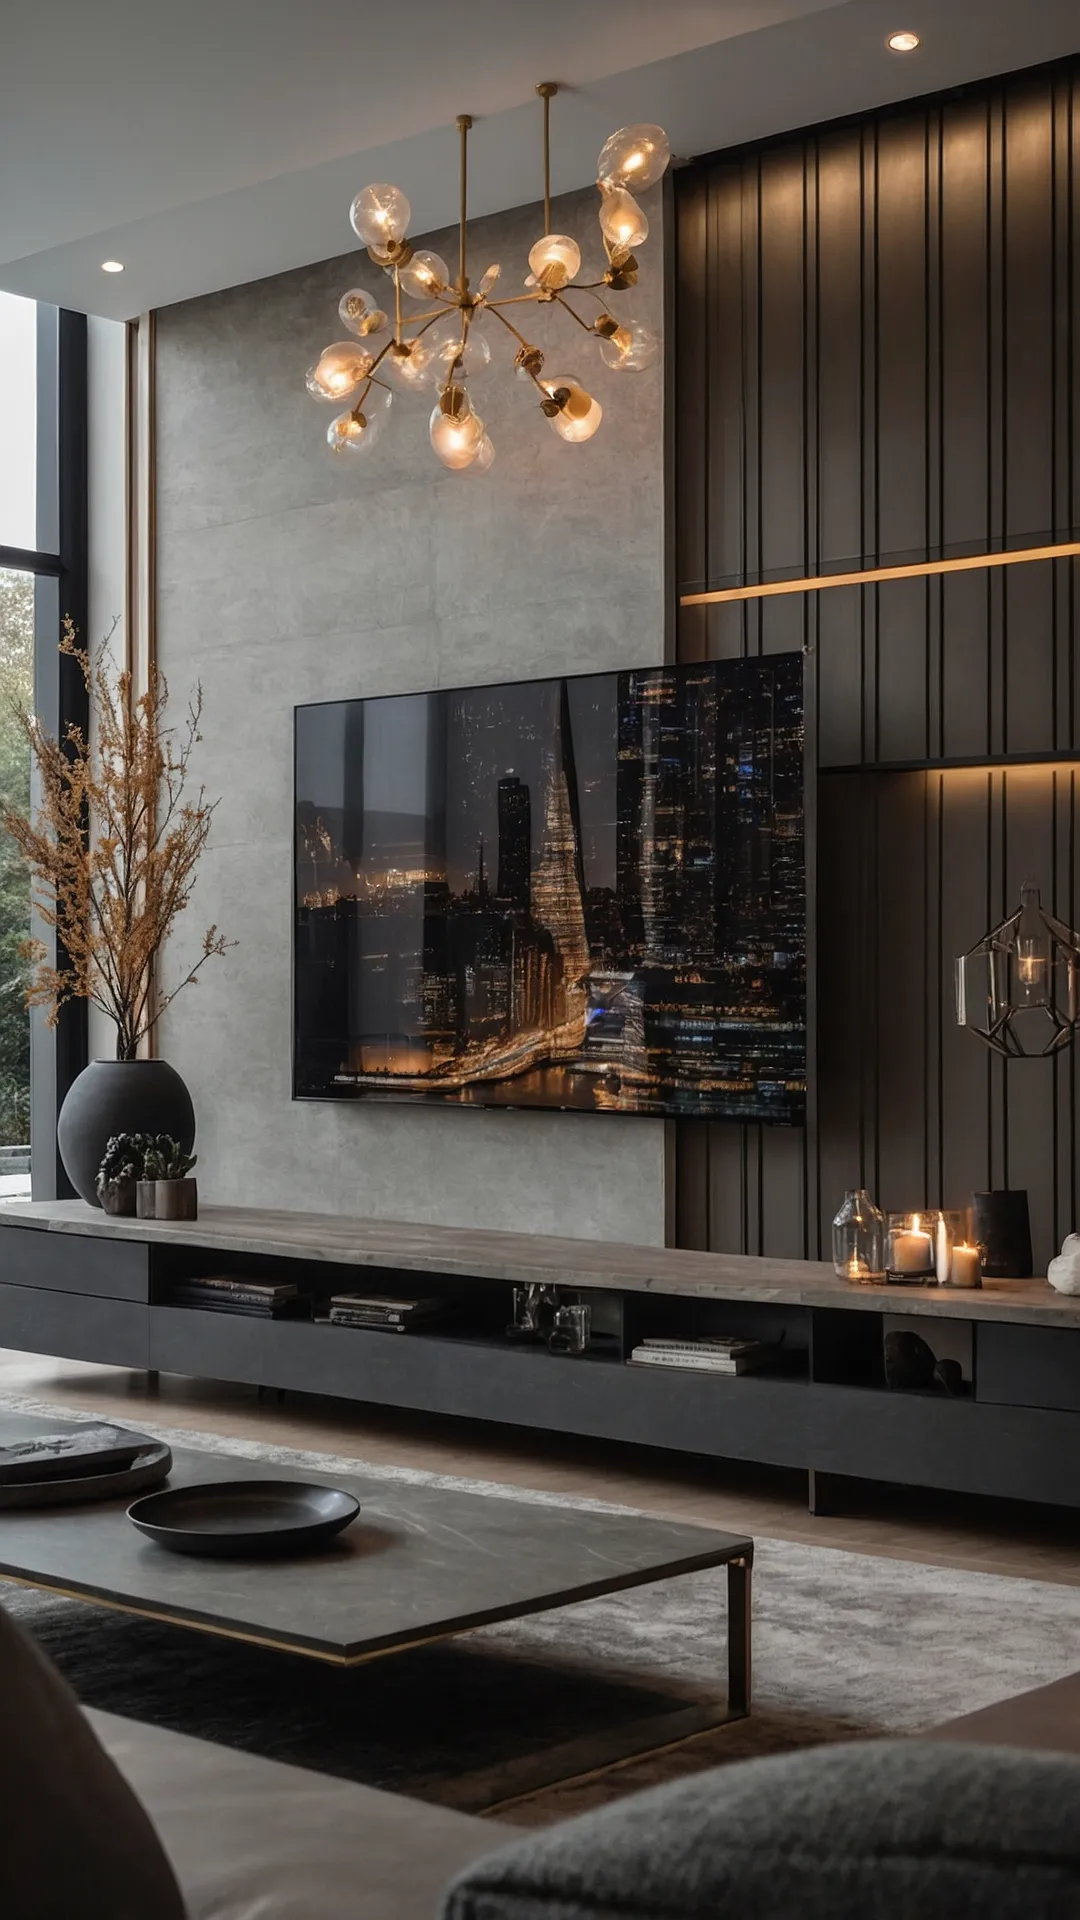
#3 Dreamscape Lounge
Step into this modern living room and prepare for a serious glow-up from your average couch potato setup! That massive TV isn’t just a screen; it’s practically a portal to another city, making your current view look a little dull. Picture epic gaming sessions where every pixel pops, or movie nights that feel like you’re actually in the director’s cut. You might even feel so fancy sitting here, you’ll start speaking in a British accent or demanding artisanal snacks from the kitchen.
Look up, and you’ll spot that crazy cool chandelier that looks like a giant, glowing atom, ready to illuminate all your genius thoughts (or just your pizza). Everything in this room, from the sleek, super-flat coffee table to the mood-setting candles, screams ‘sophisticated adult who definitely has their life together.’ It’s the kind of space that makes you want to swap your sweatpants for something slightly more chic, even if you’re just debating what to watch next. You might get so comfortable, you’ll forget you ever had plans to leave.
#4 Botanical Bliss Haven
This modern living room is basically the ultimate chill zone, designed for maximum comfort and coolness. Just look at that huge, L-shaped sofa – it’s practically begging for you to stretch out, binge-watch your favorite show, or maybe even host a sleepover for your entire friend group. With the cozy fireplace flickering below a super sleek TV, you’ve got all the essentials for epic movie nights or intense gaming sessions, making it tough to ever leave this stylish oasis.
Beyond just comfort, this place is straight-up interior design goals! Those huge windows let in so much natural light, making the whole room feel bright and airy – perfect for all your Instagram stories or just soaking up the sun. The sleek fireplace, those cool shelves with little bits of art, and that super unique chandelier really make this living room pop. It’s the kind of modern, grown-up space that still feels totally inviting and makes your own bedroom (with its questionable poster collection) look a little… less glamorous.
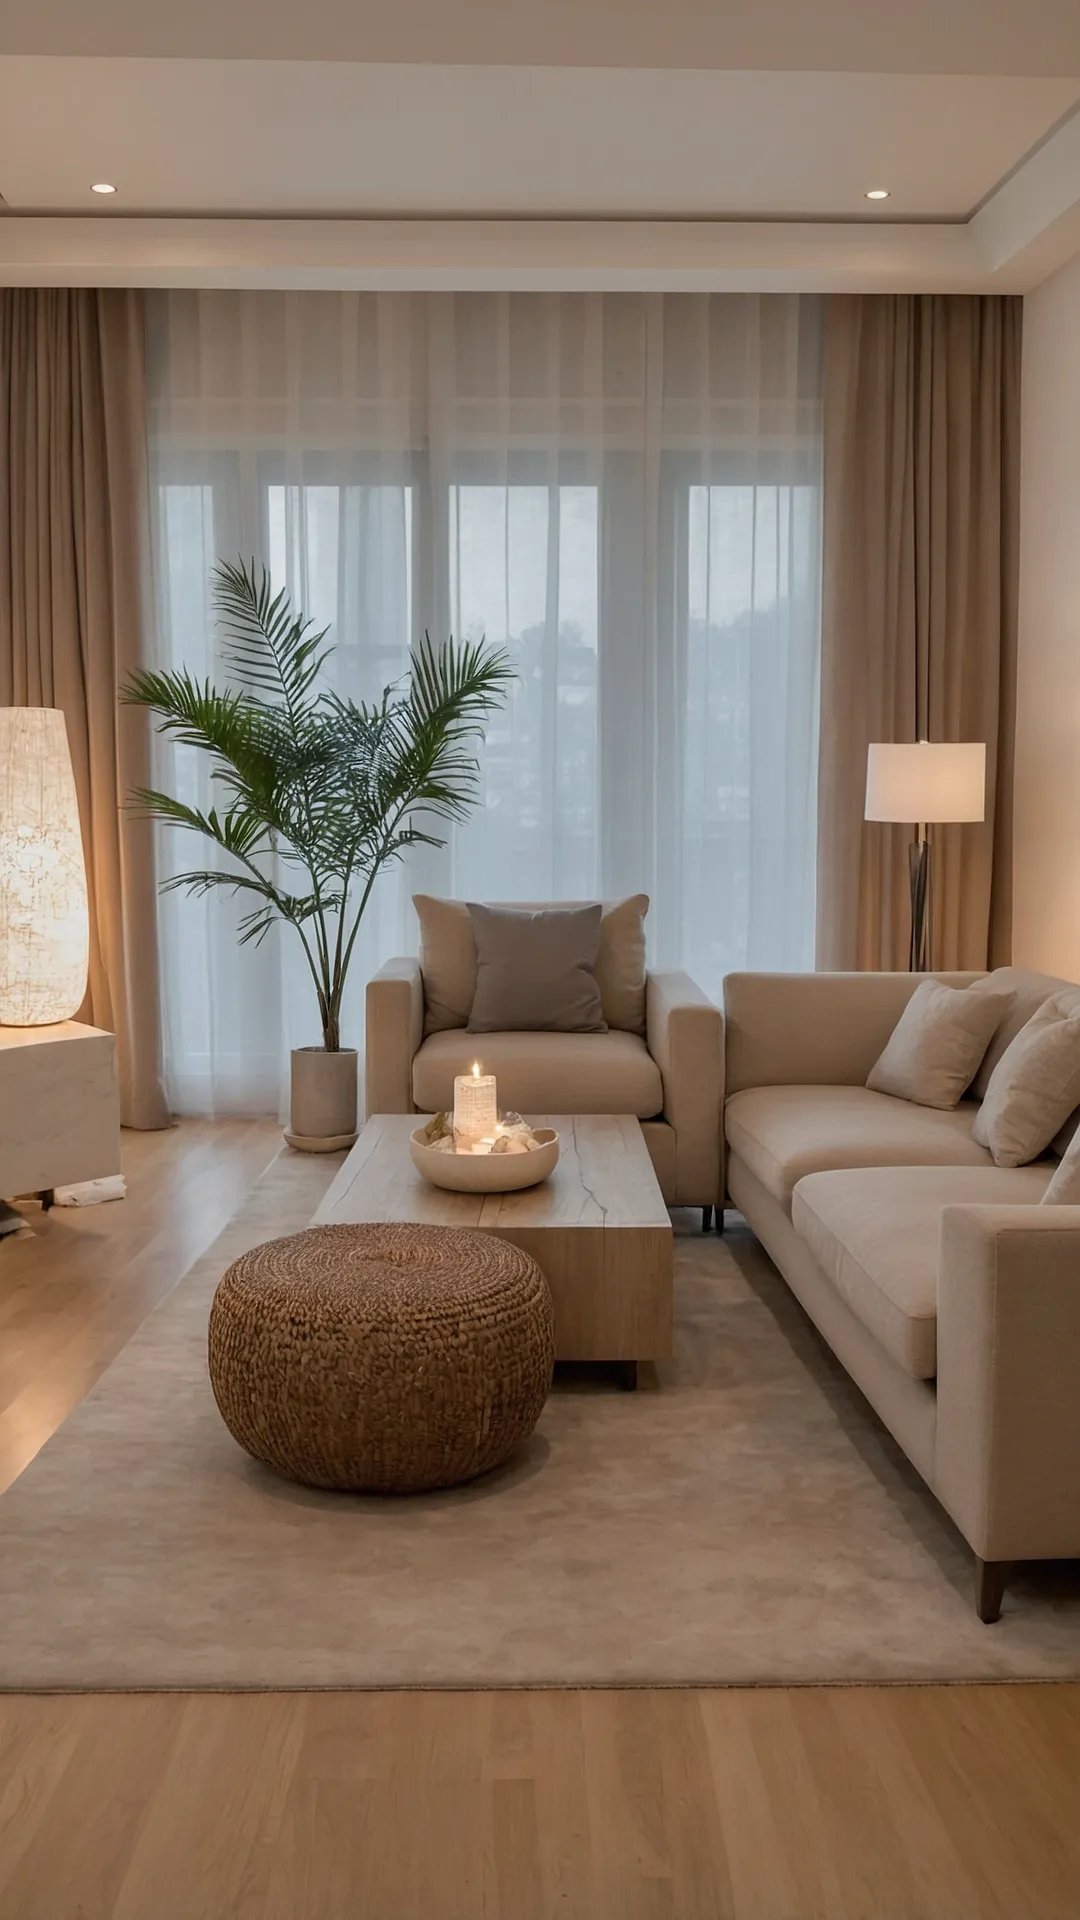
#5 The Unplugged Oasis

Step into this modern living room and you might just forget all your worries, like that math test next week or why your phone battery dies so fast. Those plush couches practically scream, “Come here and watch 10 episodes of your favorite show!” It’s got that super chill, grown-up vibe where everything just *fits* perfectly for ultimate relaxation. That big leafy plant isn’t just for show; it’s probably soaking up all the good vibes (and maybe some of your teen angst).
Notice how everything is all nice and neutral? It’s like the room itself decided to be effortlessly cool without trying too hard. From the sleek wooden coffee table (perfect for holding your elaborate board game setup or just a bowl of popcorn) to the cozy woven pouf that looks like the ultimate footrest, every piece is saying ‘welcome to your comfy zone.’ And with those soft lights and glowing candle, this room is basically begging you to put on some chill music and forget about doing chores for a bit. It’s definitely a level up from throwing a blanket over a pile of dirty clothes and calling it a ‘fort!’