7 Essential Steps for Dealing with Metal Shavings in Oil (Learn More)
Metal shavings in oil indicate potential damage or wear in the engine. Take immediate action by consulting a professional mechanic for diagnosis and repair options.
Metal shavings in your oil can be a concerning sign as it suggests that there may be damage or excessive wear occurring inside your engine. When metal shavings are present, it is crucial to address the issue promptly to prevent further damage and potential breakdowns.
By seeking the expertise of a professional mechanic, they can assess the situation, diagnose the root cause, and provide repair options to rectify the problem. Ignoring this issue could lead to more severe engine damage or even complete engine failure, making it necessary to take quick action. By following the advice of a professional, you can ensure that your vehicle continues to run smoothly and avoid costly repairs in the future.
Understanding The Impact Of Metal Shavings In Oil
The Dangers Of Metal Shavings In Oil
Metal shavings in oil may seem like a minor issue, but they can have serious consequences for your engine’s health and performance. Understanding the potential dangers is crucial for proactive maintenance and avoiding costly repairs. Here are some key points to consider:
- Increased friction: Metal shavings floating in your oil can cause friction between moving parts, leading to accelerated wear and tear. The particles act like tiny abrasive agents that can grind against delicate surfaces.
- Engine overheating: As metal shavings circulate through the oil system, they can obstruct the flow, impeding the oil’s ability to lubricate and cool the engine. This can result in excessive heat buildup, which can damage vital components.
- Component damage: Metal shavings have the potential to harm various engine parts, including bearings, pistons, and cylinder walls. The sharp edges of the shavings can cause scratches, grooves, or even punctures, compromising the integrity of these essential components.
How Metal Shavings Affect Engine Performance
Metal shavings in oil can significantly impact your engine’s overall performance and decrease its efficiency. Consider the following points:
- Reduced power and responsiveness: With the presence of metal shavings, the components of your engine may not function as smoothly or efficiently as they should. This can lead to a noticeable decrease in power and responsiveness, making the engine feel sluggish or unresponsive.
- Unusual engine noise: As the metal shavings wreak havoc on your engine, you may start to notice strange or excessive noises. These noises can range from rattling or clanking sounds to louder-than-usual engine operation. Ignoring these sounds can worsen the damage and potentially lead to catastrophic engine failure.
- Decreased fuel efficiency: Metal shavings cause increased friction and heat, which can require your engine to work harder. This additional strain can result in reduced fuel efficiency, leading to more frequent trips to the gas station and increased expenses.
The Importance Of Early Detection And Prevention
Detecting and addressing metal shavings in your oil early on is vital to preventing further damage and minimizing repair costs. Consider the following points:
- Regular oil analysis: Performing routine oil analysis can help detect the presence of metal shavings early. By analyzing the oil’s composition, experts can identify microscopic metal particles and determine the severity of the issue.
- Timely oil changes: Regularly changing your engine oil and filters can help flush out any existing metal shavings and prevent further contamination. Adopting a proactive oil change schedule ensures that your engine runs on clean, fresh oil.
- Professional inspection: If you discover metal shavings in your oil or experience any related symptoms, it’s essential to consult a professional mechanic. They can perform a thorough inspection to identify the source of the problem and recommend the necessary repairs or replacements.
By understanding the dangers of metal shavings in oil, how they affect engine performance, and the importance of early detection and prevention, you can safeguard your engine’s health and prolong its lifespan. Regular maintenance and proactive measures go a long way in ensuring a smooth and trouble-free driving experience.
Step 1: Conduct A Visual Inspection
How To Properly Inspect Oil For Metal Shavings:
When it comes to maintaining your vehicle’s health, monitoring the oil regularly is crucial. One important aspect of oil inspection is checking for the presence of metal shavings, as they can indicate underlying issues with the engine. Follow the steps below to properly inspect oil for metal shavings:
- Drain the oil: Start by draining the oil from your vehicle. This will provide you with a sample to visually inspect for any metal shavings.
- Allow time for settling: Let the drained oil sit for a few minutes to allow any sediments, including metal shavings, to settle at the bottom of the container.
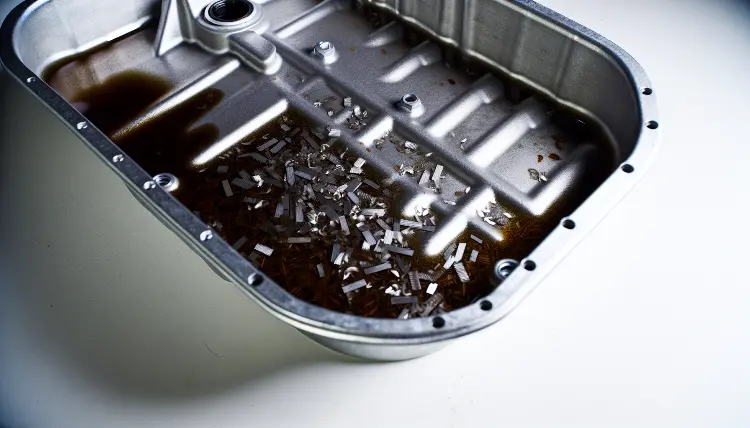
- Observe the oil: Once the oil has settled, carefully examine it for any signs of metal shavings. Pay close attention to both the oil surface and the bottom of the container.
- Use a flashlight: To get a clearer view, use a flashlight to shine light through the oil and identify any metallic particles that may be present.
- Look for reflective specks: Metal shavings typically appear as tiny, reflective specks within the oil. These specks may vary in size and color, depending on the type of metal.
Identifying Different Types Of Metal Shavings:
Not all metal shavings are created equal. Different types of metal shavings can provide valuable insights into the specific issue your engine may be facing. Here are some common types of metal shavings you may come across during your inspection:
- Bronze or copper shavings: These shavings often indicate an issue with the engine’s bearing or bushings.
- Aluminum shavings: Aluminum shavings are usually a sign of a problem with pistons, piston rings, or cylinder walls.
- Iron or steel shavings: These shavings can be indicative of a variety of issues, including excessive wear on parts such as valves, camshafts, or crankshafts.
- Silver or shiny shavings: Shiny shavings may suggest a problem with the transmission, such as worn gears or synchronizers.
Common Signs Of Metal Shavings In Oil:
Identifying metal shavings in your oil can help you catch potential problems early on and avoid more extensive damage to your engine. Keep an eye out for the following common signs during your inspection:
- Metallic sheen: If the oil appears to have a metallic sheen or sparkles when exposed to light, it may contain metal shavings.
- Loud knocking noises: Unusual knocking or metallic noises coming from the engine can indicate that metal shavings are causing friction and interfering with normal engine operation.
- Decreased engine performance: Metal shavings can cause friction and wear, leading to decreased engine performance, including reduced power and acceleration.
- Increased oil consumption: If you notice that your vehicle is consuming oil at a faster rate than usual, it could be due to metal shavings causing increased friction and oil breakdown.
Conducting a visual inspection of your oil for metal shavings is an essential step in vehicle maintenance. By knowing how to properly inspect the oil, identifying different types of metal shavings, and being aware of the common signs, you can take appropriate action to address any underlying issues promptly.
Remember, regular oil analysis and timely maintenance can go a long way in ensuring your vehicle’s longevity and performance.
Step 2: Perform An Oil Analysis
The Benefits And Importance Of Oil Analysis
Performing regular oil analysis is crucial for maintaining the health and longevity of your engine. Here are the key points to understand about the benefits and importance of oil analysis:
- Oil analysis helps in identifying the presence of metal shavings in the oil, which can indicate potential engine problems such as worn-out bearings, pistons, or crankshafts.
- Early detection of metal shavings can help prevent major engine failures and costly repairs.
- Oil analysis provides insights into the overall condition of the engine, including its cleanliness, lubricity, and wear characteristics.
- It helps monitor the effectiveness of the oil and filter, identifying when it’s time for a change.
- By analyzing the oil, you can also detect any contamination, coolant leaks, or fuel dilution, which may affect the engine’s performance.
- Performing oil analysis regularly helps track trends and establish a baseline for future comparisons, ensuring your engine is performing optimally.
How To Collect Oil Samples For Analysis
Collecting oil samples properly is essential to ensure accurate analysis results. Follow these steps:
- Start with a clean oil drain pan or container to avoid any contamination.
- Run the engine to reach its operating temperature, allowing the oil to circulate thoroughly.
- Power off the engine and let it cool down for a few minutes to avoid any burns.
- Locate the oil drain plug or access point and carefully drain a sufficient amount of oil into the container.
- Avoid collecting the first few seconds of oil, as it may contain particles that have settled at the bottom of the oil pan.
- Collect the oil sample in a clean, sealed container that is specifically designed for oil analysis.
- Label the container with essential information such as the date, mileage, and location of the sample.
- Send the sample to a reputable oil analysis laboratory for testing, following their specific instructions for submission.
- Make sure to collect the sample in a way that represents the average condition of the oil, as inconsistent samples may lead to misleading analysis results.
Interpreting Oil Analysis Results For Metal Shavings
When analyzing the oil sample for metal shavings, pay attention to the following points:
- The presence of metal shavings or particles in the oil could indicate abnormal wear of engine components.
- The size, shape, and composition of the metal shavings can provide clues about where the wear is occurring and the severity of the issue.
- Consult the oil analysis report provided by the laboratory to understand the concentration and types of metal detected.
- Compare the observed metal levels with established reference values to determine if the wear is within the normal range.
- High metal concentrations may indicate excessive wear that requires immediate attention.
- Consider the overall condition of the engine, the specific components affected, and the trend of metal concentration in previous analysis reports.
- Consult a qualified mechanic or engineer to interpret the results accurately and advise on the appropriate actions to take.
Remember, oil analysis is an important tool for preventive maintenance, allowing you to catch potential engine problems early on. By regularly monitoring and interpreting the results, you can ensure the longevity and performance of your engine.
Step 3: Determine The Source Of Metal Shavings
After you’ve discovered metal shavings in your oil, it’s time to pinpoint the source. This step is crucial in understanding the severity of the issue and taking appropriate action. Here are some potential causes to consider and troubleshooting techniques to help you locate the source:
Potential Causes Of Metal Shavings In Oil:
- Worn piston rings: Over time, piston rings can wear down, leading to metal-to-metal contact and the creation of shavings. Look for signs of excessive oil consumption or poor engine performance.
- Damaged bearings: Bearings support rotating parts in the engine, and if they become damaged or worn, it can result in metal shavings. Check for unusual knocking or grinding noises from the engine.
- Faulty valve train components: Issues with valves, valve lifters, or pushrods can cause metal shavings to appear. Pay attention to any ticking sounds or poor engine performance.
- Transmission problems: Metal shavings in the oil could indicate transmission issues. Look for gear slippage, grinding noises, or difficulty shifting gears.
- Overheating: Excessive heat can lead to component failure and the production of metal shavings. Check for signs of overheating such as coolant leaks, high engine temperature, or steam coming from the engine bay.
Inspecting Engine Components For Wear And Tear:
- Conduct a visual inspection: Carefully examine the engine components, paying close attention to areas where metal shavings could originate. Look for signs of wear, cracks, or loose parts.
- Check the oil filter: Inspect the oil filter for any metal particles or debris. This could provide a clue about the source of the shavings.
- Examine the dipstick: Inspect the oil on the dipstick for metallic glitter or an unusual appearance. This could suggest the presence of metal shavings.
Troubleshooting Techniques To Locate The Source:
- Conduct an oil analysis: Send a sample of the oil containing metal shavings to a reputable laboratory for analysis. They can pinpoint the exact composition of the metal and help identify the source.
- Use a borescope: A borescope is a small camera attached to a flexible tube that allows you to visually inspect hard-to-reach areas of the engine. It can help locate any damaged or worn components.
- Consult a professional mechanic: If you’re unable to determine the source or need assistance with troubleshooting, it’s best to consult a knowledgeable mechanic. They can use their expertise and specialized tools to diagnose the problem accurately.
Remember, metal shavings in your oil should never be ignored. Identifying the source promptly can help prevent further damage to your engine and save you from costly repairs down the road.
Step 4: Safely Drain And Change The Oil
When you discover metal shavings in your oil, it’s crucial to take immediate action to prevent further damage to your engine. Here are some important steps to follow for safely draining and changing the oil contaminated with metal shavings.
Precautions To Take When Draining Oil Contaminated With Metal Shavings:
- Before starting the draining process, make sure to gather all the necessary tools and equipment. This includes a drain pan, a wrench for removing the drain plug, a new oil filter, and fresh oil.
- Always wear protective gloves and eyewear to keep yourself safe from any harmful substances in the oil.
- It’s a good practice to let the engine cool down for a while before you start the oil change process. This reduces the risk of burning yourself on hot surfaces.
- Consult your vehicle’s manual or do some research to locate the drain plug and oil filter. It’s crucial to have a clear understanding of their positions before proceeding.
- Place the drain pan directly beneath the drain plug to catch the used oil. Be sure to position it properly to avoid any spills or leaks.
- Carefully remove the drain plug using a wrench, allowing the contaminated oil to flow into the drain pan. Be cautious not to drop the plug into the pan or let it fall into the engine compartment.
- While the oil is draining, inspect the drain plug and magnetic oil drain plug gasket for any metal shavings. This can give you an idea of the severity of the issue and if further inspection is needed.
- Once the oil has completely drained, safely dispose of the contaminated oil and the oil filter. Do not pour the used oil down the drain or throw it in regular trash bins, as it is hazardous. Refer to the proper oil disposal methods below.
Proper Oil Disposal Methods:
- Visit a local recycling center or an auto parts store that accepts used oil for proper disposal. Many of these establishments have designated containers and procedures for recycling or disposing of used oil safely.
- Check with your local government or municipality for any special collection events or guidelines for disposing of used oil. Some areas have specific drop-off locations or pick-up services for used oil and other hazardous materials.
- Never dump used oil into the environment, such as in drains, onto the ground, or in bodies of water. It can contaminate the soil, waterways, and harm wildlife.
- By following proper oil disposal methods, you contribute to protecting the environment and preventing potential hazards.
Guidelines For Choosing The Right Oil For Your Engine:
- Selecting the appropriate oil for your engine plays a vital role in preventing metal shavings and other contaminants from building up.
- Refer to your vehicle’s manual to determine the recommended oil viscosity and specifications. Using the wrong type of oil can lead to engine damage.
- Consider the environment and climate conditions in which your vehicle operates. Different oils perform better under specific temperature ranges, so choose one that suits your driving conditions.
- Look for oil that meets industry standards and has the american petroleum institute (api) certification. This ensures that the oil has undergone rigorous testing and meets quality standards.
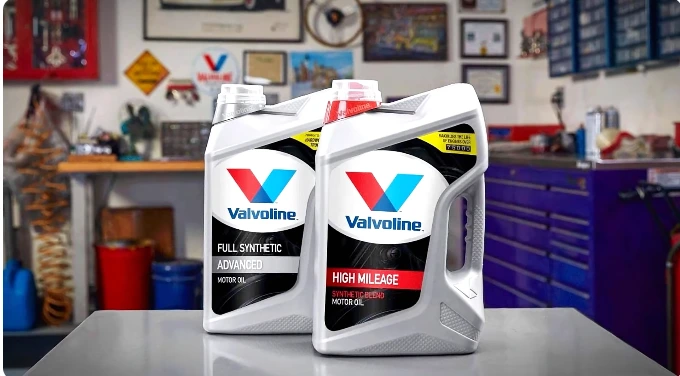
- Synthetic oils are often recommended due to their superior performance and longevity. However, always follow the manufacturer’s recommendations for oil type and viscosity.
- Regularly change your oil according to the recommended intervals to maintain engine health and minimize the risk of metal shavings and other contaminants accumulating.
Remember, taking proper precautions when draining oil contaminated with metal shavings and disposing of the oil responsibly are essential for the well-being of both your engine and the environment.
Step 5: Clean And Inspect The Engine
After removing the metal shavings from the engine components and draining the contaminated oil, it is essential to thoroughly clean and inspect the engine. This step will help identify any damage and ensure that the engine is in optimal condition before reinstalling new parts.
Here’s what you need to know:
- Removing metal shavings from engine components: The first step in cleaning the engine is to remove any remaining metal shavings that may be lodged in various components. This can be achieved by using specialized cleaning agents and tools specifically designed for this purpose.
- Using specialized cleaning agents and tools: When selecting cleaning agents, make sure they are suitable for your engine type and do not cause any harm to the materials. Additionally, use tools such as soft brushes, lint-free cloths, and compressed air to effectively remove the metal shavings without causing any further damage.
- Inspecting and repairing damaged parts: Once the engine components are free of metal shavings, it’s crucial to carefully inspect each part for any signs of damage or wear. Pay close attention to areas where the shavings were concentrated. Look out for cracked or chipped surfaces, excessive wear, or any abnormalities that could affect the engine’s performance. If any damaged parts are found, it is recommended to replace or repair them as needed.
By thoroughly cleaning and inspecting the engine, you can ensure that all metal shavings are removed and that any potential damage is addressed. This step is crucial in maintaining the longevity and performance of your engine.
Step 6: Prevent Future Contamination
Regular maintenance and proper preventive measures can help you avoid metal shavings in your oil in the future. Here are some steps you can take to prevent future contamination:
- Implementing regular maintenance and inspection schedules:
- Perform regular oil changes according to the manufacturer’s recommendations.
- Establish an inspection schedule to monitor the condition of your engine components.
- Check for any signs of wear or damage during these inspections.
- Take note of any abnormal vibrations or noises that could indicate an issue.
- Regularly monitor your oil filter’s condition and replace it if necessary.
- Using magnetic drain plugs and oil filters:
- Magnetic drain plugs can attract and capture metal shavings before they circulate in the engine.
- This helps prevent them from causing further damage.
- Consider investing in high-quality oil filters that have magnetic properties.
- These filters can effectively trap any metal shavings, preventing them from reaching sensitive engine components.
- Properly sealing engine components to prevent debris:
- Ensure that gaskets, seals, and other engine components are in good condition.
- Replace any worn-out or damaged seals to prevent debris from entering the engine.
- Use gasket sealants or silicone to create an effective seal between engine components.
- This will help keep out any external contaminants, including metal shavings.
Implementing these preventive measures will decrease the risk of metal shavings contaminating your oil in the future, and ultimately prolong the life of your engine. Remember to stick to a routine maintenance schedule and pay attention to any signs of trouble to catch potential issues before they become major problems.
Step 7: Regular Monitoring And Testing
Setting Up A Monitoring System For Metal Debris
Regular monitoring and testing of your oil is crucial when it comes to detecting any signs of metal shavings. By setting up an effective monitoring system, you can promptly identify potential issues and take the necessary steps to address them.
Here are some key points to remember:
- Implement regular oil analysis: Conducting routine oil analysis is an effective way to monitor for metal debris in your oil. This process involves taking samples of your oil and sending them to a laboratory for analysis. The results will provide insights into the condition of your oil and any contaminants present, including metal shavings.
- Utilize oil analysis kits: You can streamline the monitoring process by using oil analysis kits that are specifically designed for detecting metal debris. These kits typically include sampling bottles, labels, and instructions for properly collecting oil samples. They may also come with prepaid shipping materials, making it convenient to send your samples to the lab.
- Work with a reliable laboratory: Choosing a reputable laboratory is essential to ensure accurate and reliable results. Look for a laboratory with experience in oil analysis and metal debris detection. They should have the necessary equipment and expertise to efficiently analyze your samples.
- Keep track of past results: Maintaining a record of your oil analysis results over time can help identify any patterns or trends in the presence of metal shavings. By comparing current results to historical data, you can determine if the levels of metal debris are increasing or decreasing, providing valuable insights into the health of your machinery.
Establishing A Schedule For Oil Analysis
Regularly analyzing your oil samples is not only about detecting metal shavings but also monitoring the overall condition of your oil. Here’s how you can establish a schedule for oil analysis:
- Consult equipment manufacturer recommendations: Start by reviewing the manufacturer’s guidelines for oil analysis. They may provide specific instructions on the frequency of oil analysis based on the equipment type, usage, and operating conditions. Following these recommendations will ensure you stay on top of monitoring your oil’s condition.
- Consider the equipment’s criticality: Some machinery may be more critical to your operations than others. For equipment that is crucial to your processes, more frequent oil analysis may be necessary. This will help you identify potential problems early on and proactively address them.
- Determine oil change intervals: The frequency of oil analysis should also align with your oil change intervals. Oil change intervals vary depending on factors such as equipment type, operating conditions, and the type of oil used. Analyzing the oil before an oil change allows you to assess its condition and make informed decisions regarding oil replacement.
- Evaluate the oil’s history: If you have experienced issues related to metal shavings or other contaminants in the past, it may be prudent to increase the frequency of oil analysis. This proactive approach can help prevent costly repairs and downtime.
Reacting Quickly To Any Signs Of Metal Shavings
Detecting metal shavings in your oil is just the first step. Taking prompt action is crucial to prevent further damage and ensure the longevity of your equipment. Here’s what you should do when faced with signs of metal shavings:
- Identify the source: Begin by determining the source of the metal shavings. It can originate from various components in the machinery, including bearings, gears, pistons, or shafts. Accurately identifying the source will help pinpoint the underlying issue and facilitate effective repairs.
- Notify maintenance personnel: Once metal shavings are detected, inform your maintenance personnel immediately. They can evaluate the severity of the situation and determine the best course of action. Timely communication is key to mitigating any potential risks.
- Conduct a thorough inspection: A thorough inspection of the affected equipment is necessary to assess the extent of the damage. Identifying any wear, damage, or malfunctioning components will help guide the repair process.
- Take corrective measures: Based on the inspection findings, take the necessary corrective measures. This may involve replacing damaged components, lubrication adjustments, or implementing additional maintenance protocols.
- Monitor post-repair performance: After addressing the issue, continue to monitor the equipment closely. Regular oil analysis and monitoring will help ensure that the metal debris has been effectively eliminated and prevent future occurrences.
By following these steps, you can establish a robust monitoring system, adhere to a consistent oil analysis schedule, and react promptly to any signs of metal shavings. Regular monitoring and testing will help maintain the health and efficiency of your equipment while minimizing the risk of unexpected failures.
Conclusion
To recap, the presence of metal shavings in oil indicates potential mechanical issues within your vehicle’s engine. This could be due to wear and tear on various components, such as bearings, pistons, or camshafts. If you notice metal shavings in your oil, it is crucial to address the problem promptly to prevent further damage.
First, consult a professional mechanic who can assess the severity of the issue and provide appropriate solutions. They may recommend an oil change, filter replacement, or, in extreme cases, engine repairs. Ignoring metal shavings can lead to more significant problems, including engine failure and expensive repairs.
Maintaining regular oil changes and adhering to the manufacturer’s recommended maintenance schedule can help prevent metal shavings in your oil. Monitoring your oil’s condition and conducting regular inspections can also catch any early signs of trouble. By addressing metal shavings in your oil promptly, you can ensure your vehicle’s longevity and avoid costly repairs down the line.
Don’t hesitate to seek expert advice and take necessary action to keep your engine running smoothly. Remember, the health of your engine is essential for the overall performance and safety of your vehicle. So, stay vigilant and act swiftly when it comes to metal shavings in your oil.
