What Happens If You Put R134A in an R12 System? (Explained)
Putting r134a in an r12 system can cause serious damage to the system components. A mix of these refrigerants can lead to poor cooling performance, compressor failure, and potential safety hazards.
When different refrigerants are mixed, they can react with the system’s oil and create harmful acids, which corrode the system’s components. This can result in costly repairs or the need for a complete system replacement. It is crucial to use the correct refrigerant for each system to ensure optimal performance and longevity.
Understanding The Differences Between R134A And R12
When it comes to automotive air conditioning systems, the type of refrigerant used plays a crucial role in the overall performance and efficiency. Two common types of refrigerants used in these systems are r134a and r12. However, these refrigerants differ in several ways.
Let’s delve into the properties of r134a and r12 to gain a better understanding of their differences.
Properties Of R134A
R134a, also known as tetrafluoroethane, is a hydrofluorocarbon (hfc) refrigerant. It gained popularity as a replacement for r12 due to its lower ozone depletion potential. Here are some key properties of r134a:
- Low global warming potential: R134a has a significantly lower global warming potential compared to r12, making it more environmentally friendly.
- High thermodynamic performance: It provides excellent cooling capacity and can effectively absorb and release heat in automotive air conditioning systems.
- Compatible with certain system components: R134a requires some modifications in the a/c system, including the replacement of certain seals, o-rings, and lubricants to ensure compatibility.
Properties Of R12
R12, also known as dichlorodifluoromethane, is a chlorofluorocarbon (cfc) refrigerant that was widely used in automotive air conditioning systems before its production was phased out due to its harmful impact on the ozone layer. Let’s take a look at the properties of r12:
- High ozone depletion potential: R12 has a high potential for depleting the ozone layer, contributing to environmental concerns and the ban on its use.
- Superior thermal stability: R12 has excellent thermal stability, allowing it to provide efficient cooling in automotive air conditioning systems.
- Incompatibility with r134a: Due to the differences in their molecular structures, r12 and r134a cannot be mixed, and using r134a in an r12 system can lead to poor performance and potential damage to the system.
Understanding the differences between r134a and r12 is essential for maintaining and servicing automotive air conditioning systems. While r134a offers lower environmental impact and comparable thermodynamic performance, it requires system modifications. On the other hand, r12, despite its superior thermal stability, is no longer used and should not be replaced with r134a.
It’s crucial to consult professionals and adhere to manufacturer guidelines to ensure proper refrigerant usage and optimize system performance.
Potential Consequences Of Using R134A In An R12 System
Are you wondering what could happen if you mistakenly use r134a refrigerant in an r12 system? It’s essential to understand the potential consequences to avoid damage and costly repairs. In this section, we’ll discuss the incompatibility issues, reduced cooling performance, and damage to components that can arise from such a mix-up.
Incompatibility Issues
- R134a and r12 refrigerants have different chemical properties, making them incompatible in an air conditioning system.
- The lubricants used in each system are not interchangeable, potentially leading to lubrication issues.
- The different pressure characteristics of r134a and r12 can cause leaks and damage to seals and hoses within the system.
Reduced Cooling Performance
- R12 and r134a operate at different pressure levels, affecting their cooling performance in an air conditioning system.
- When used in an r12 system, r134a may not cool as effectively as the system requires, resulting in insufficient cooling capacity.
- Reduced cooling performance can lead to discomfort during hot weather and prolonged cooling times.
Damage To Components
- The use of r134a in an r12 system can cause damage to various components, including the compressor, condenser, and expansion valve.
- The compressor, designed for r12, may experience increased strain when operating with r134a, potentially leading to premature failure.
- The condenser, not optimized for the different pressure characteristics of r134a, might experience reduced efficiency and cooling capacity.
- The expansion valve, designed for r12, may not function properly with r134a, causing improper refrigerant flow and inadequate cooling.
By understanding the potential consequences of using r134a in an r12 system, you can avoid unnecessary damage and ensure optimal performance. If you suspect a refrigerant mismatch, it’s always best to consult a certified technician, who can safely address the issue and prevent further complications.
Remember, proper refrigerant usage is crucial for the longevity and efficiency of your air conditioning system.
Steps To Correctly Retrofit An R12 System To R134A
Retrofitting an r12 system to use r134a refrigerant requires certain steps to be followed carefully. Here is a guide on how to do it correctly:
Flushing The System
- Begin by flushing the entire system to remove any remaining r12 refrigerant and oil. Flushing helps in getting rid of any contaminants that could affect the performance of the system.
- Use an approved flushing solution or a refrigerant recovery machine to clean the system thoroughly.
- Ensure that all the components, including the evaporator, condenser, hoses, and the compressor, are flushed properly to eliminate any traces of the previous refrigerant.
- Flush the system until the solution being used comes out clean, indicating the removal of any remaining r12 refrigerant.
Replacing Components
- Check for any worn-out or damaged components in the system that may need replacement.
- Replace the old r12-compatible components with their r134a-compatible counterparts. This includes the receiver-drier, expansion valve, o-rings, and any other component specifically designed for r134a.
- Make sure the replacement components are compatible and meet the specifications for the r134a system.
Charging With R134A
- Once the system has been flushed and the components replaced, it is time to charge it with r134a refrigerant.
- Use an accurate charging and evacuation machine to ensure the correct amount of refrigerant is added to the system.
- Follow the manufacturer’s guidelines and recommendations to determine the appropriate amount of refrigerant required for your specific system.
- Slowly introduce the r134a refrigerant into the system, allowing it to stabilize and evenly distribute throughout the components.
- Monitor the pressure and temperature levels while charging to ensure they are within the recommended range.
- After charging, check for any leaks and make necessary adjustments or repairs if required.
Remember, retrofitting an r12 system to use r134a should be done with proper care and knowledge. It is recommended to consult with a professional technician or refer to the manufacturer’s guidelines for your specific vehicle to ensure a successful conversion.
Flushing The System
Imagine this scenario: you accidentally put r134a refrigerant in an r12 system. Uh-oh! Don’t panic just yet. In this section, we will discuss the importance of flushing the system and the steps to follow to rectify the situation.
Importance Of Flushing
Flushing the system is crucial to ensure the proper functioning of your air conditioning system and avoid potential damage. Here’s why it’s important:
- Removes contaminants: Flushing the system helps eliminate any contaminants or debris that may have entered the system. These contaminants can cause blockages and hinder the system’s performance.
- Prevents damage: R134a refrigerant is not compatible with r12 systems, which can lead to damage if not addressed promptly. Flushing the system helps remove any traces of r134a, preventing potential harm to the components.
- Ensures efficiency: Flushing the system allows for a clean slate, enabling the efficient circulation of the appropriate refrigerant. This ensures optimum performance and cooling efficiency.
Steps To Flushing
Now that we understand the importance of flushing, let’s dive into the steps you need to take to rectify the situation.
- Gather the necessary tools: Before you begin, make sure you have the following tools on hand: a refrigerant recovery machine, a vacuum pump, a manifold gauge set, and a replacement filter.
- Recover the refrigerant: Start by using a refrigerant recovery machine to remove the r134a refrigerant from the system. This step is crucial to avoid any cross-contamination.
- Vacuum the system: Once the refrigerant is recovered, connect a vacuum pump to the manifold gauge set. Open the valves and let the vacuum pump run for at least 30 minutes. This will remove any moisture or air from the system.
- Replace the filter: After vacuuming, it’s important to replace the filter to ensure a clean system. Remove the old filter and install a new one in its place.
- Flush the system: Now comes the crucial step of flushing the system. Use a flushing agent specifically designed for automotive air conditioning systems. Follow the manufacturer’s instructions, ensuring that the entire system is thoroughly flushed.
- Vacuum again: Once the system is flushed, connect the vacuum pump and manifold gauge set again. Repeat the vacuuming process for another 30 minutes to remove any remaining flushing agent.
- Recharge with r12: Finally, it’s time to recharge the system with the correct refrigerant, r12. Connect the manifold gauge set, open the valves, and recharge the system following the manufacturer’s guidelines.
Remember, if you are not familiar with the process or lack the necessary tools, it’s best to consult a professional to perform the flushing and recharging of your air conditioning system.
Flushing the system is vital when you accidentally put r134a refrigerant in an r12 system. It ensures the removal of contaminants and prevents potential damage. By following the step-by-step process, you can rectify the situation and restore your air conditioning system to its proper functioning.
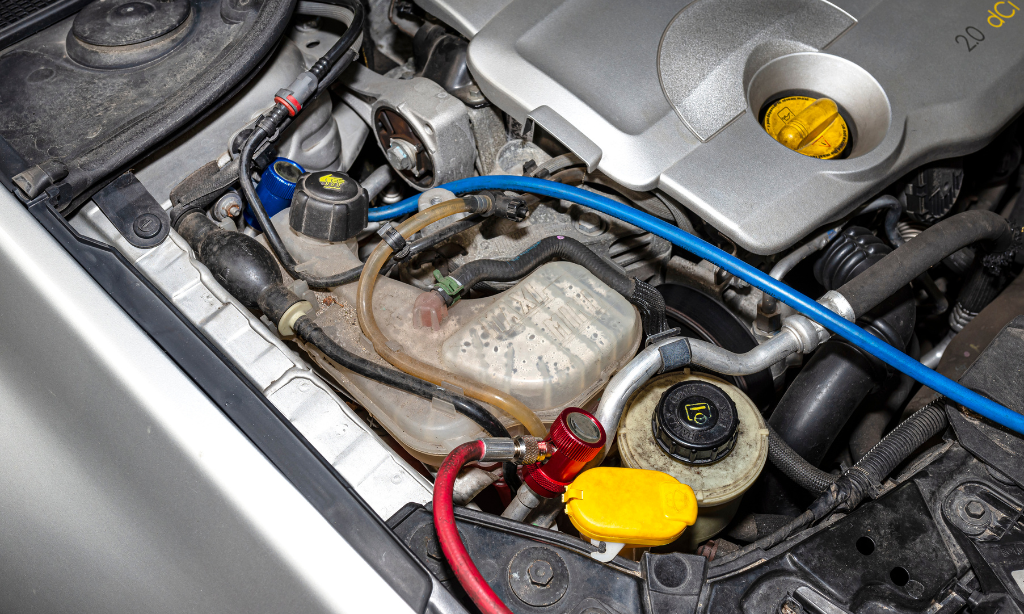
Replacing Components
When it comes to putting r134a in an r12 system, one of the most important considerations is the need to replace certain components in order to ensure compatibility and optimal performance. Here, we will discuss the key components that need to be replaced when transitioning from r12 to r134a.
O-Rings And Seals
When retrofitting an r12 system to accommodate r134a refrigerant, it is crucial to replace the o-rings and seals. This is because the o-rings and seals used in r12 systems are not designed to withstand the properties of r134a. Failure to replace these components can result in leaks, which can impact the system’s performance and efficiency.
Replacing the o-rings and seals involves the following key aspects:
- Compatibility: O-rings and seals suitable for r134a refrigerant should be used. These components are specifically designed to handle the characteristics of r134a, ensuring a proper seal and preventing refrigerant leakage.
- Inspection: Before installing new o-rings and seals, it is important to thoroughly inspect the system for any existing damage or wear. This will help identify any potential issues that may need to be addressed before replacement.
- Proper installation: When replacing o-rings and seals, it is crucial to ensure they are installed correctly. Proper lubrication should be applied to facilitate installation and ensure a proper seal. Following manufacturer guidelines for installation procedures is recommended.
Receiver/Drier
Another important component that needs to be replaced when transitioning from r12 to r134a is the receiver/drier. The receiver/drier serves multiple functions in an air conditioning system, including moisture and debris removal.
Consider the following points related to replacing the receiver/drier:
- Compatibility: A receiver/drier designed specifically for r134a refrigerant should be used. This component is engineered to handle the unique properties of r134a and prevents moisture from entering the system, which can lead to corrosion and reduced cooling efficiency.
- System flushing: Before installing the new receiver/drier, it is recommended to thoroughly flush the system to remove any residual debris or contaminants. This ensures optimal performance and efficiency of the new receiver/drier.
- Proper installation: When installing the new receiver/drier, it is important to follow the manufacturer’s instructions and guidelines. This includes proper torquing of fittings and ensuring a secure and leak-free connection.
Expansion Valve
In the process of retrofitting an r12 system to accommodate r134a refrigerant, replacing the expansion valve is essential. The expansion valve regulates the flow of refrigerant into the evaporator, controlling the cooling capacity of the system.
Consider the following aspects when replacing the expansion valve:
- Compatibility: An expansion valve designed for r134a refrigerant must be used. This ensures that the valve is able to properly regulate the flow of r134a, allowing for efficient cooling and preventing potential damage that can occur with improper expansion rates.
- System evacuation: Before installing the new expansion valve, the system should be evacuated to remove any remaining r12 refrigerant, debris, or moisture. This step is important to ensure optimal performance and prevent mixing of different refrigerants.
- Proper calibration: After installation, the new expansion valve should be properly calibrated to ensure the correct flow rate of r134a. This calibration helps maintain the desired cooling capacity and overall system performance.
In Conclusion
Making the transition from r12 to r134a involves replacing specific components to ensure compatibility and optimal system performance. The o-rings and seals, receiver/drier, and expansion valve are critical components that should be replaced with versions engineered for r134a refrigerant. By following these guidelines and properly replacing these components, the transition can be smooth and successful, resulting in an efficient and reliable air conditioning system.
Charging With R134A
When it comes to charging an r12 system with r134a refrigerant, there are a few important steps to follow. Let’s take a look at each one:
Proper Amount Of Refrigerant
To ensure the system functions efficiently, it’s crucial to use the proper amount of r134a refrigerant. Here are the key points to keep in mind:
- Consult the manufacturer’s specifications or an automotive professional for the recommended amount of refrigerant for your r12 system.
- Overcharging or undercharging the system can lead to poor performance or damage.
- Correct refrigerant levels help maintain the cooling capacity and overall effectiveness of the air conditioning system.
- It’s essential to measure and add the exact amount of r134a refrigerant required for your vehicle.
Evacuating The System
Before charging your r12 system with r134a refrigerant, it’s necessary to properly evacuate the system. These are the crucial steps involved:
- Use a vacuum pump to remove any remaining r12 refrigerant and moisture from the system.
- Evacuating helps eliminate contaminants and ensures a clean environment for the new refrigerant.
- It’s essential to maintain a deep vacuum to achieve the desired results.
- Follow safety precautions and use appropriate equipment when handling the evacuation process.
Charging Process
Once the system is properly evacuated, it’s time to charge it with r134a refrigerant. Here’s the charging process explained:
- Connect the r134a charging manifold to the low-pressure service port of the system.
- Start the engine and turn on the air conditioning to its maximum setting.
- Slowly open the can tap valve on the charging manifold to allow the r134a refrigerant to enter the system.
- Monitor the pressure readings and ensure they correspond to the recommended levels.
- Close the can tap valve and detach the charging manifold once complete.
Remember, it’s crucial to follow the guidelines provided by the manufacturer or consult an experienced professional when charging your r12 system with r134a refrigerant. By properly measuring and adding the correct amount of refrigerant, evacuating the system, and following the charging process, you can maintain the efficiency and functionality of your air conditioning system.
Conclusion
To sum up, it is crucial to understand the potential consequences of putting r134a in an r12 system. Using the wrong refrigerant can lead to serious performance issues and damage to the system. The two refrigerants have different properties and operating pressures, which can cause issues with the compressor and other components.
Additionally, the use of the wrong refrigerant may also result in decreased cooling efficiency and increased energy consumption, posing a financial burden. It is recommended to consult with a professional technician who can properly diagnose and address any issues with your system.
Regular maintenance and adherence to manufacturer’s guidelines are essential for ensuring the longevity and optimal performance of your air conditioning system. By taking the necessary precautions, you can avoid the potential headaches and expenses associated with incorrect refrigerant usage.

- Why Are My Car Headlights Not Bright Enough? - May 9, 2024
- How Long Can You Drive With An EVAP Leak? - May 9, 2024
- What Does B Stand for in a Car? [Full Guide] - May 9, 2024
![Why Is My Dodge Grand Caravan Not Shifting? [Update 2024]](https://automhelp.com/wp-content/uploads/2023/12/2008-2020-Dodge-Grand-Caravan-How-to-Adjust-Gear-Shift-Manually-Stuck-from-Neutral_000005895-768x432.webp)

![Homemade Traction Mats [Unlock Your Vehicle’s Grip]](https://automhelp.com/wp-content/uploads/2023/07/Homemade-Traction-Mats-768x461.png)


![Can You Drive Without a Catalytic Converter? [Uncover the Truth]](https://automhelp.com/wp-content/uploads/2023/07/How-Much-Horsepower-Does-a-Turbo-Add-1-768x461.png)